What Is Blunami?
Blunami, produced by Soundtraxx, is a bluetooth-based wireless control system for model trains. It allows for controlling multiple locomotives from over 100 feet away, includes functions like sound and lights, and is operated from a phone or tablet app rather than a dedicated remote control.
In the world of conventional model trains, there are two basic control systems available: DC, and DCC. DC is Direct Current, you turn the knob on a powerpack wired to the track, and the train moves. If there are multiple locomotives on the track, they’ll all move the same way in response to the DC power input. DCC is Digital Command Control, which means that each locomotive has a computer chip in it, known as a Decoder, and the trains are operated with a wired or wireless remote control. Each decoder in each locomotive is assigned a specific receiving address, and responds only to commands meant specifically for that locomotive, which means multiple trains can move in different ways on the same powered track. The decoder also provides for functionality like sound and lights to be added to a model locomotive.
In the world of LEGO® trains, we have a variety of control options. Powered track is making a bit of a comeback with new offerings in the realm of 9 Volt, and DCC is possible with 9V LEGO® trains, but for this article we’re focusing on plastic track and battery-powered trains. The two major official systems produced by LEGO® for remote-controlled battery-powered trains are Power Functions (no longer in production) and Powered Up. There are also several third-party control systems available for LEGO® trains (PFx Brick, Sbrick, Buwizz, to name a few) as well as some third-party motor manufacturers. All of these systems have their advantages and disadvantages; the part where Blunami comes in is the point where one finds that these systems do not suit your train-running needs. For me, I want to run LONG trains with mid-train helpers, sometimes as many as 5 to 7 engines in a single train (3 or 4 up front, and 2 or 3 in the middle) with upwards of 50 or 60 freight cars. Using Power Functions, I would have to be within a few feet of the the IR receiving units in each locomotive to deliver remote control commands, so stopping the head end power and the mid-train helpers at the exact same time wasn’t doable without a second person with a second remote. Using Powered Up, controlling multiple locomotives at the same time is not readily possible. Blunami surpasses my expectations for what I want and need out of a control system for my trains, and I am pleased to report I’ve since installed it in nearly all of my L-Gauge locomotives! And because I’m so pleased with Blunami, I’d like to share my installation method so others might enjoy the same benefits as me. Let’s get started!
What Do I Need for Blunami?
To install Blunami in your LEGO® train, you will need:
A Blunami decoder
A small flathead screwdriver
A wire stripper
A pair of scissors
A battery lead wire with plug attached
A small hobby knife such as an Xacto blade
A smart device with the Blunami app installed
Optional Items:A Power Functions connection wire
A Bludaptr board from Lifelites
A soldering iron (for installing a 2200 board without a Bludaptr board)
A speaker and possibly a speaker housing from Lifelites*
LED lights and associated cables*
*Note: it is recommended to have at least a speaker OR lights, if not both, as these things help to confirm the correct operation of the Blunami decoder. At the moment, I am not using lights in my models, so this article won’t cover much about their installation.

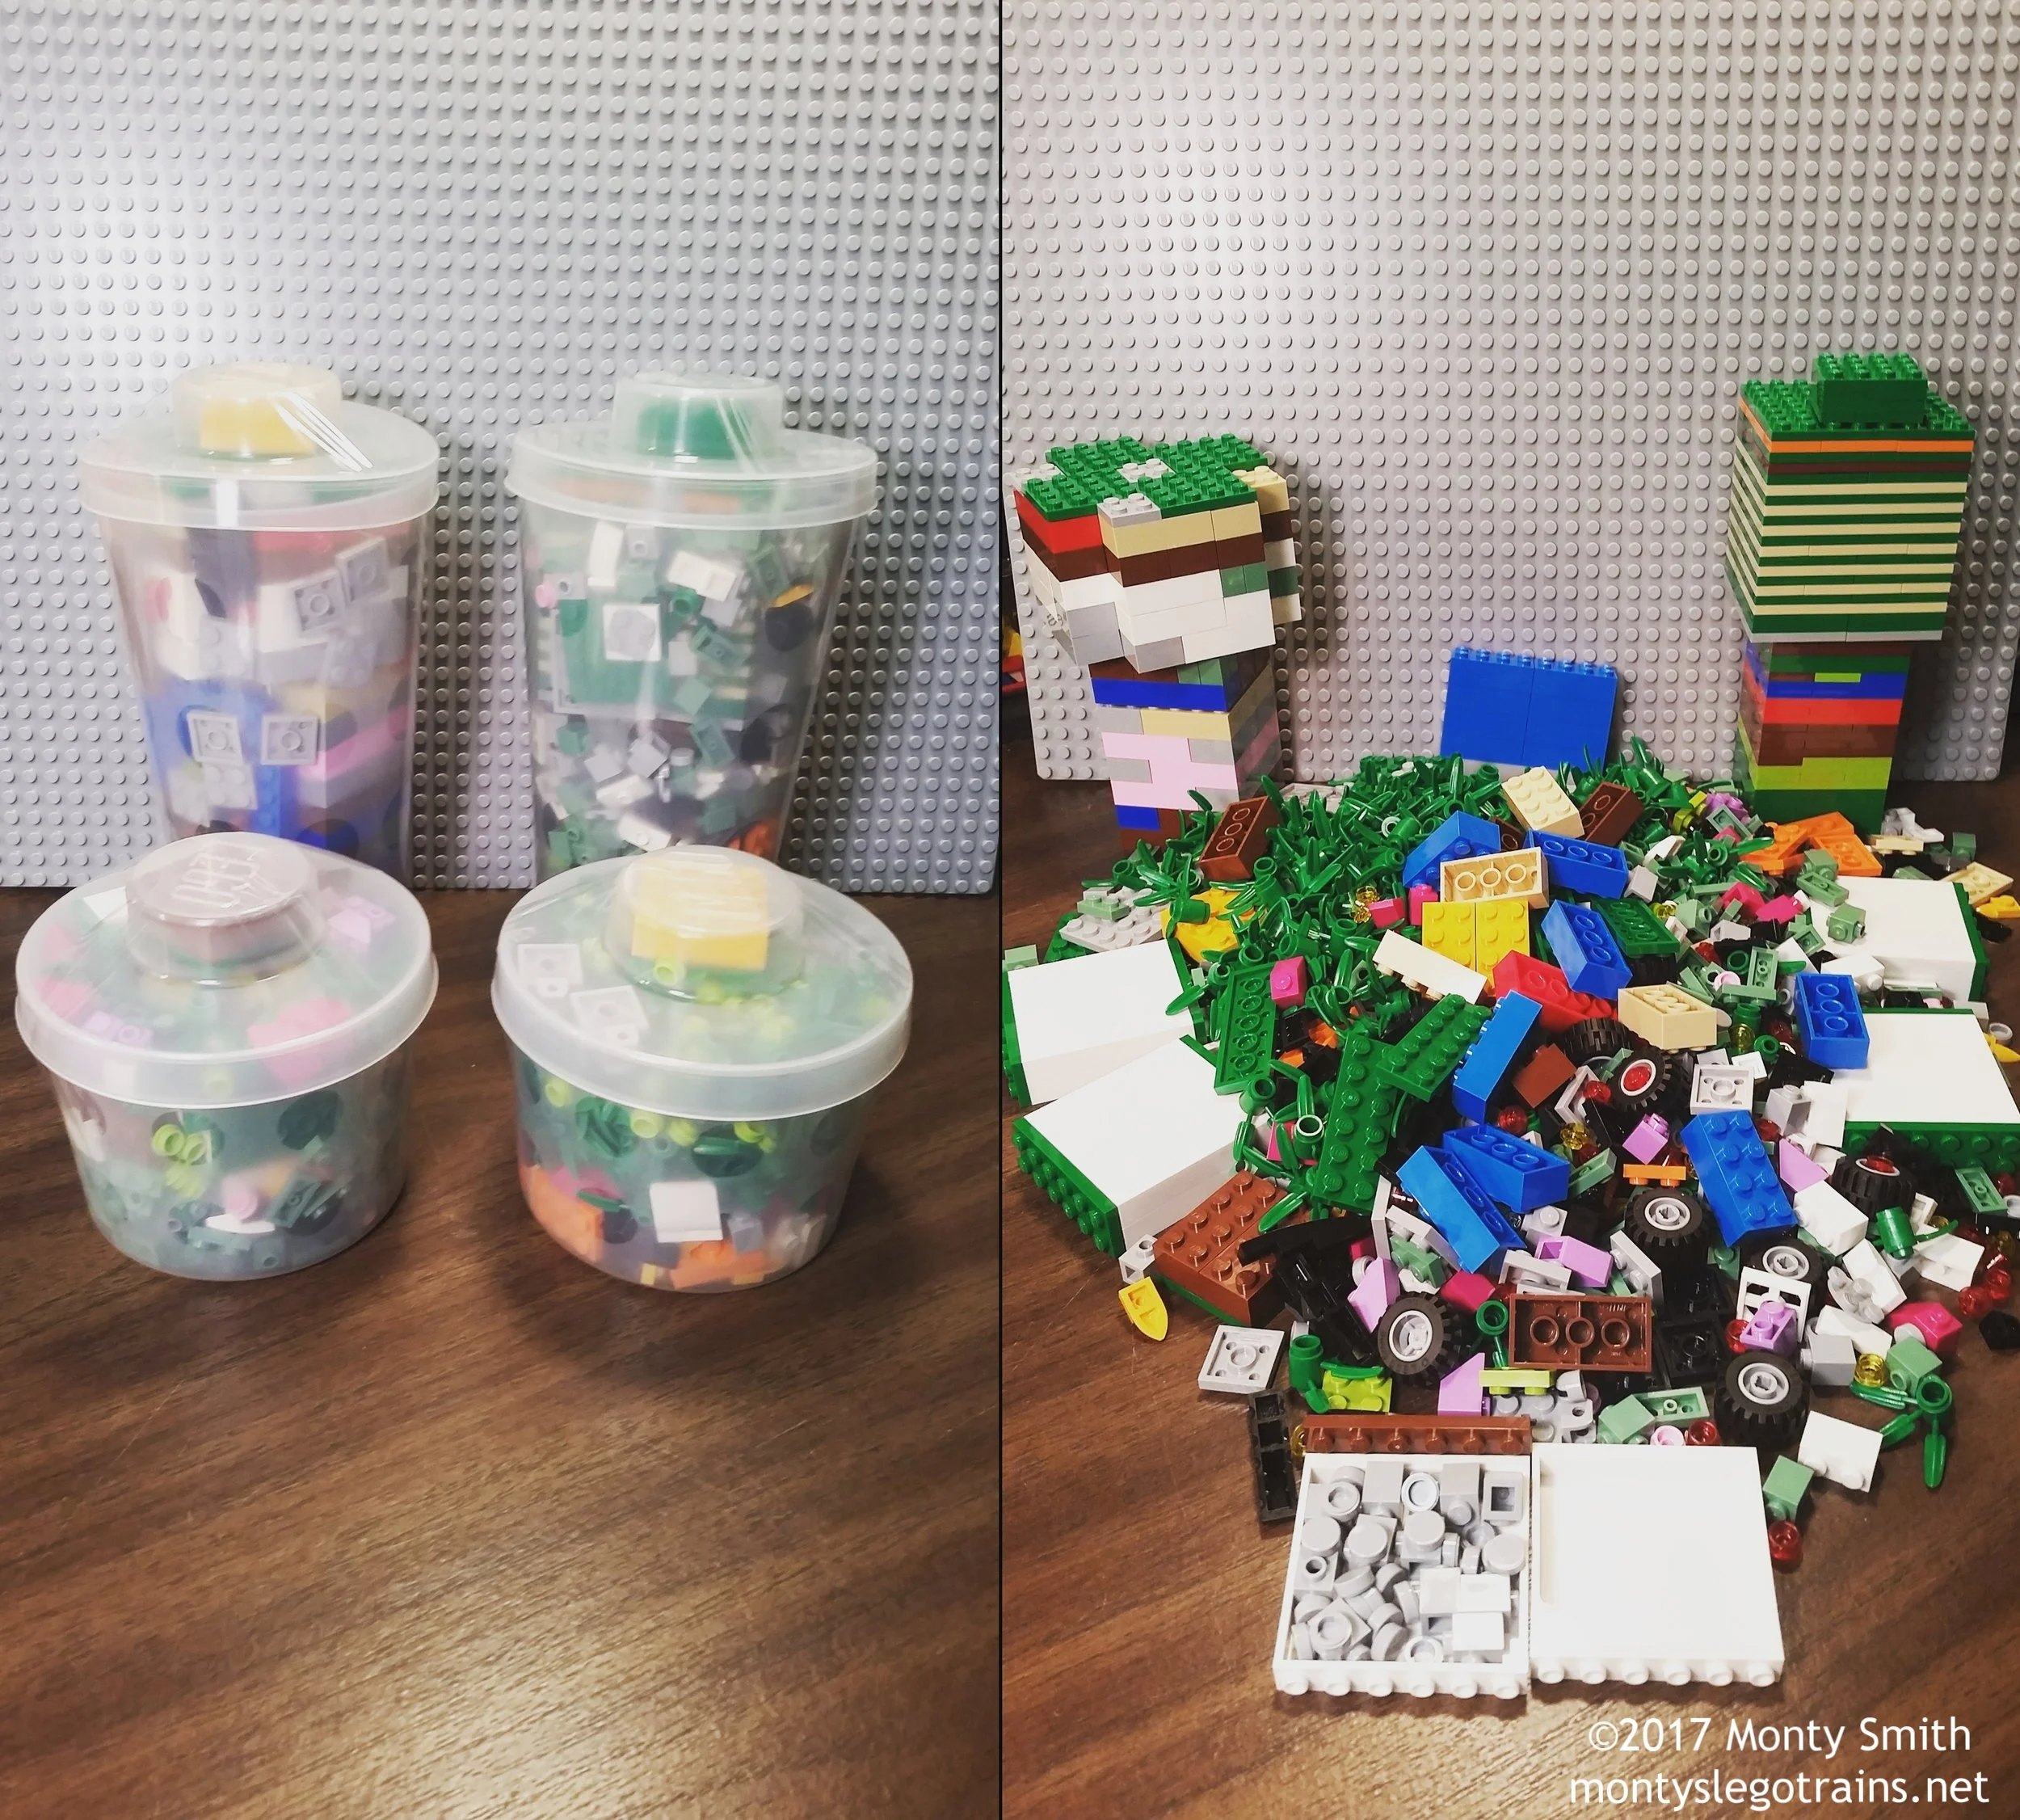
The Southern locomotive (with two Train Motors) will receive a 2200 board, and the black locomotive (with two L Motors) that has yet to receive its decals will have a 4408 installed.
There are two types of Blunami board available: The 2200 and the 4408. The important difference for us LEGO® train people is the current each board can handle. The simple explanation is that the 2200 board can handle 2 amps of power before cutting out, while the 4408 board can handle 4 amps. Most of my locomotives either have two Power Functions “L” motors, or two Power Functions “train” motors. The train motors pull a small amount of current and will be happy with the 2200, but the L motors pull significantly more current and require the use of the more robust 4408 board. If you’re not sure how much current your selected motor(s) will be pulling, check out this web page which lists the amperage of LEGO® motors. Note that the Blunami boards also cut out when they’re receiving less than 7 volts of power, so whatever battery arrangement you use, you’ll need something that can stay above 7 volts for a good while. You might like to visit my previous article about Using LiPo Batteries with LEGO® Trains. In that article I use two-cell LiPo batteries, but for Blunami, I use three-cell to ensure I stay over the 7 volt cutout limit.
Both decoders come in a selection of sound flavors, including Steam, Diesel, and Electric. There are multiple varieties of Diesel available arranged by builder (EMD, Alco, GE, etc.) so if your LEGO® locomotive has a specific prototype, you might like to research what type of prime mover the real locomotive has so you can buy a decoder with the correct sound profile. In this tutorial, I will install a 2200 decoder in my Southern GP38-2, and a 4408 in my Winchester & Western RS-11. The real GP38-2 has a 645E non-turbocharged V16 prime mover, which is offered on the EMD-2 flavor of Blunami (it is listed as a 645 without the “E” but I am told they are the same). The RS-11 uses a 251 V12, a version of which is offered on the Blunami Alco decoder. Both decoders come with a wide selection of manufacturer-appropriate bells and horns.
Now that we’ve covered all the background information, let’s get started on the install! I’d recommend reading through the whole process before actually attempting the install, so you can prepare accordingly for everything that’s going to come up.
Installing a 2200 Blunami Board
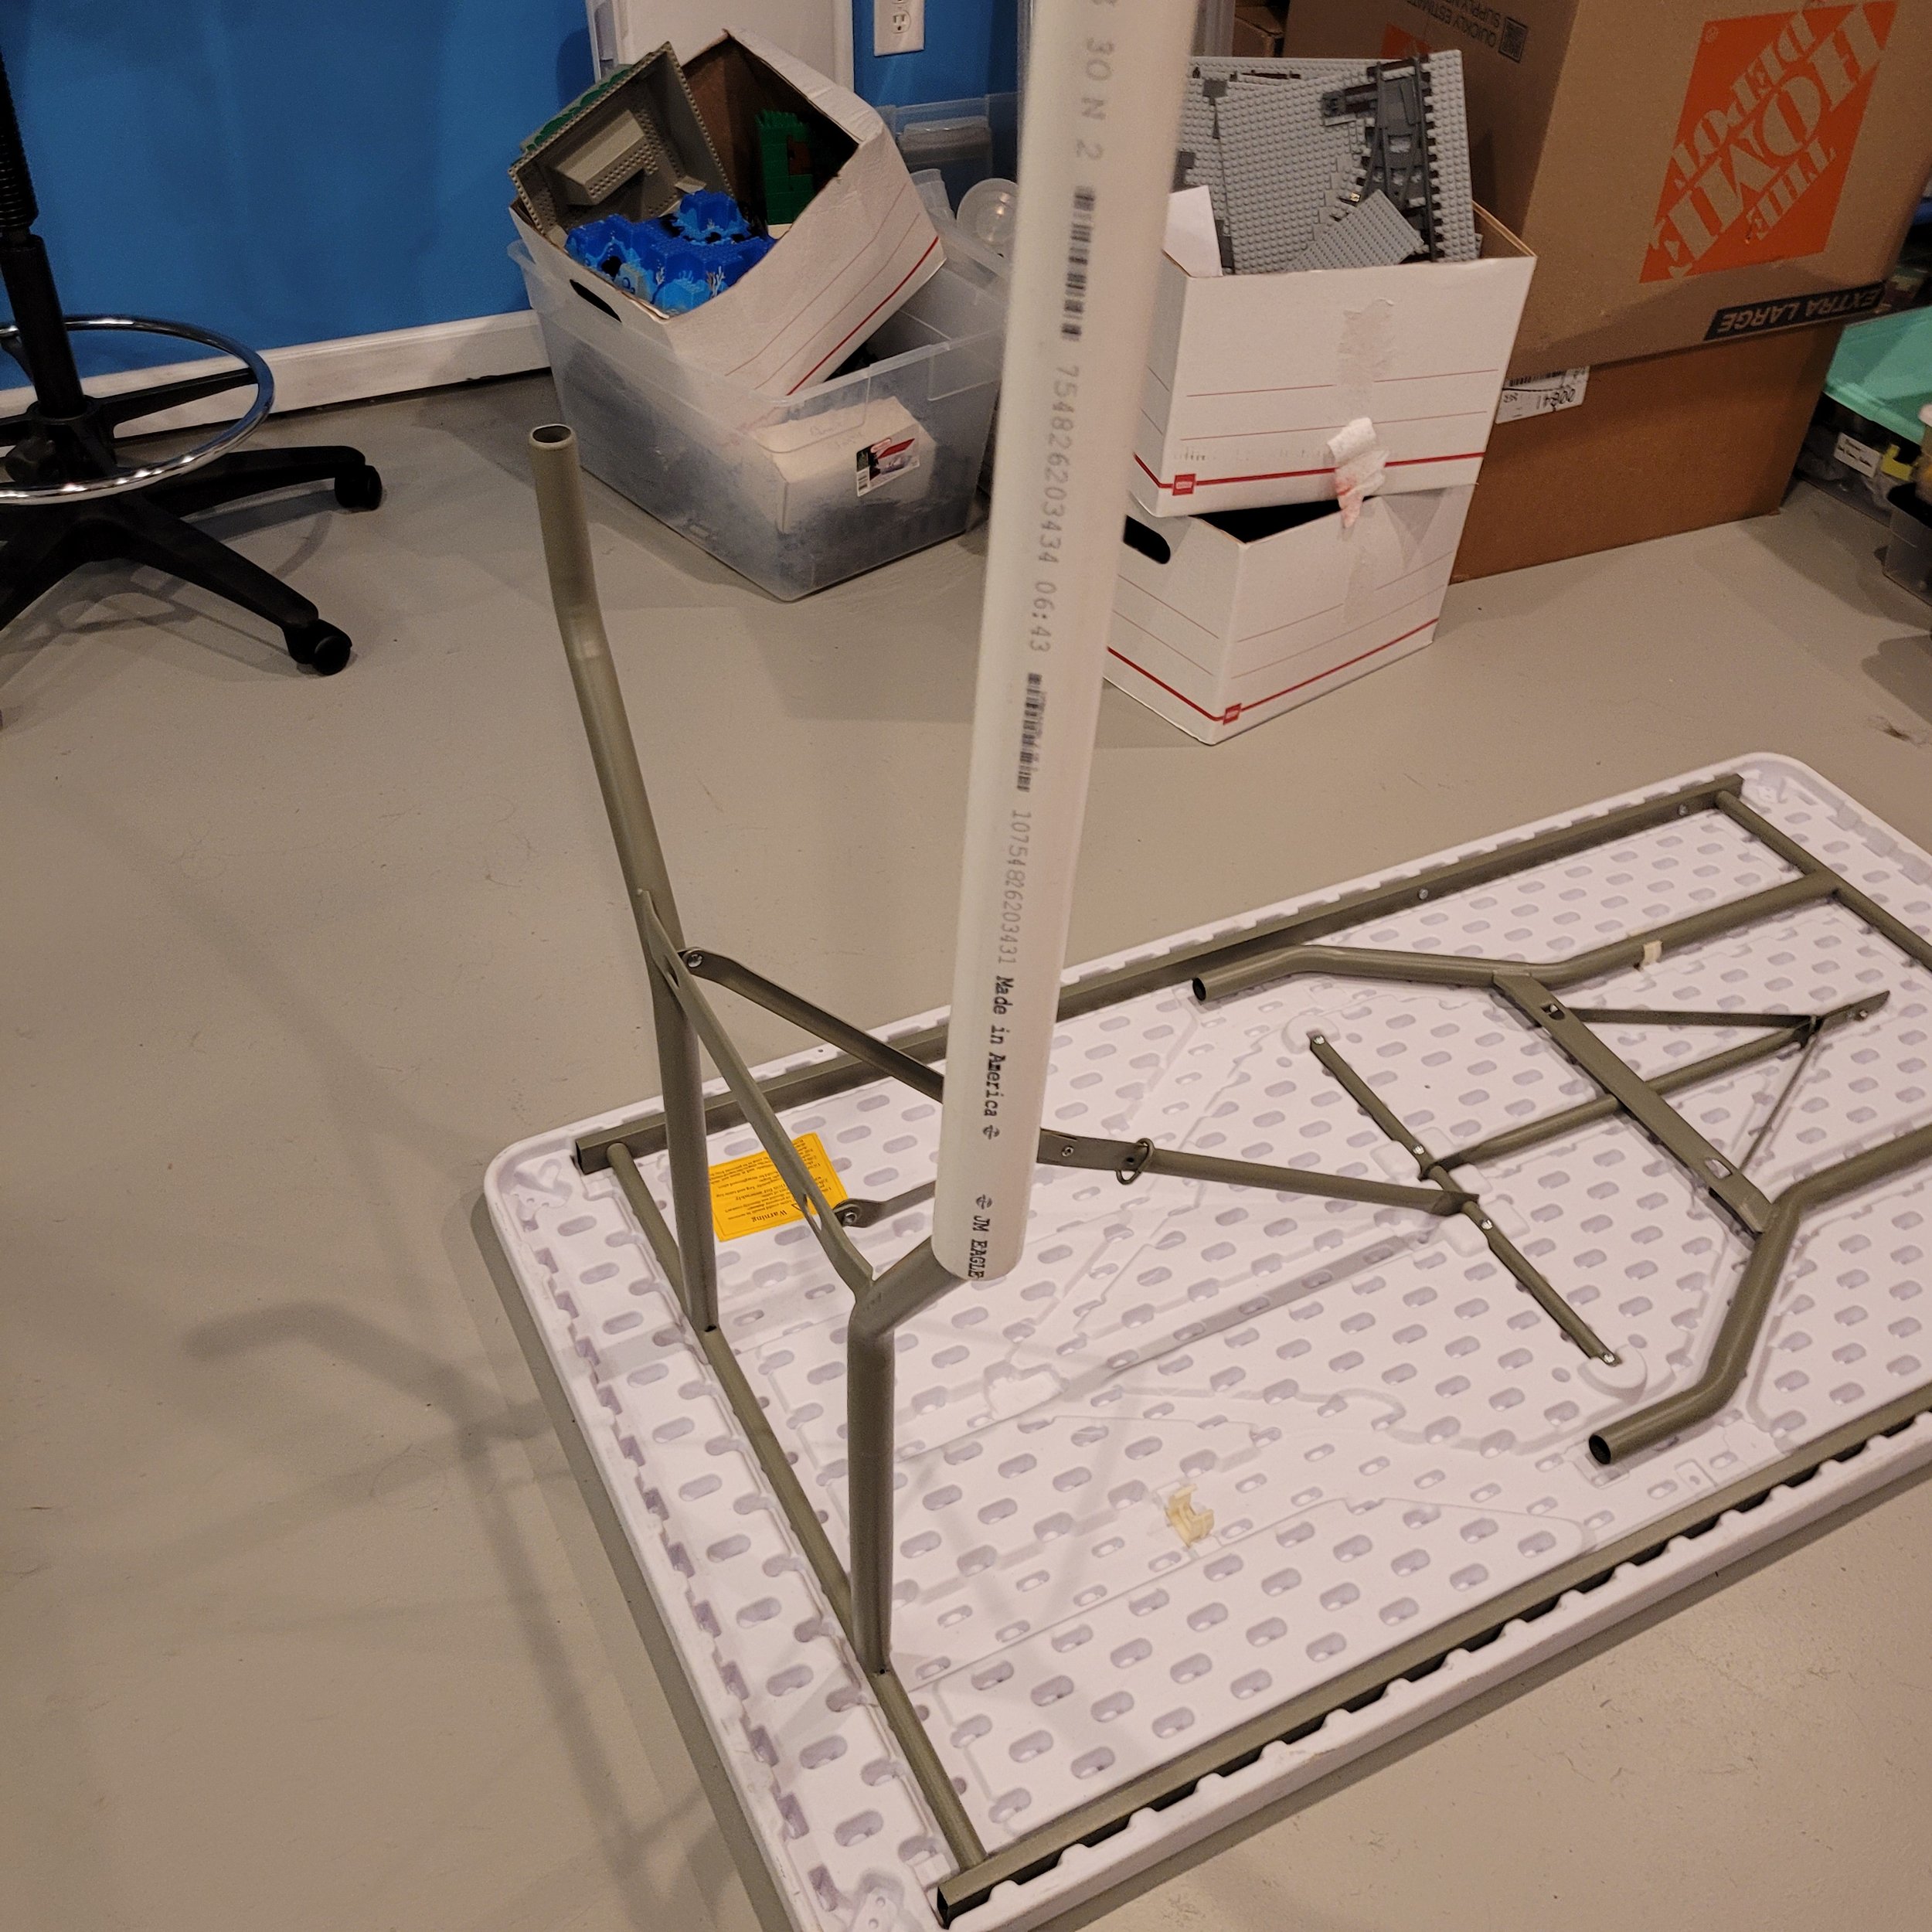
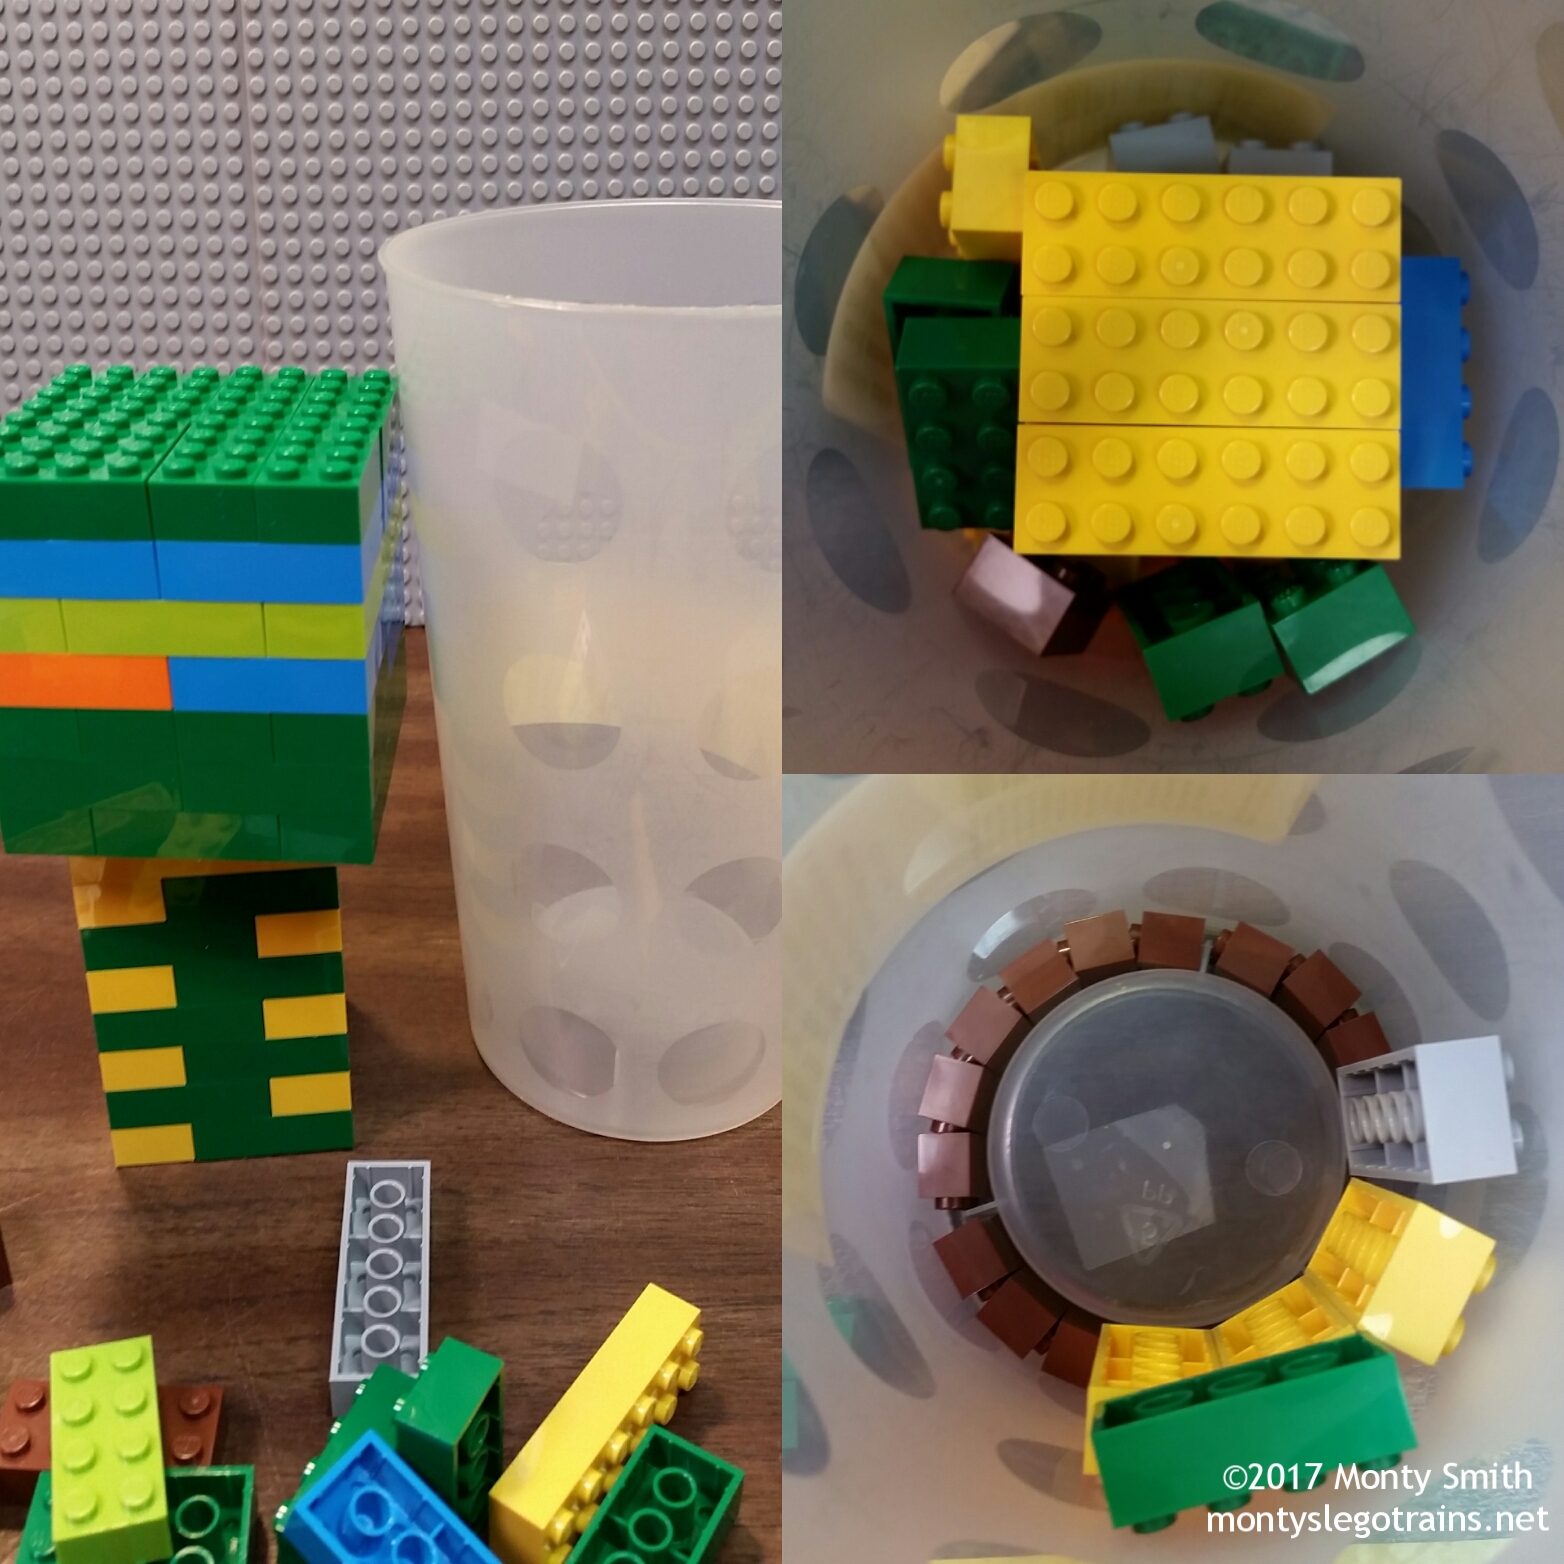
The first steps in installing Blunami in your LEGO® locomotive are to actually build the locomotive. In the case of this Southern GP38-2, I left a wide opening in the center of the frame so the cables for the train motors and the speaker wire can pass through from inside the hood. The way I build my train-motor-equipped diesels, there’s plenty of space inside to cram in the decoder and battery and such. If you’re concerned you may not have space inside your locomotive, have the Blunami components handy as you build so you can check that they’ll fit. I usually leave part of the roof removable so I can easily open the locomotive to put in or take out the battery.
You can see through the locomotive to the table below, plenty of space for wires to pass through!
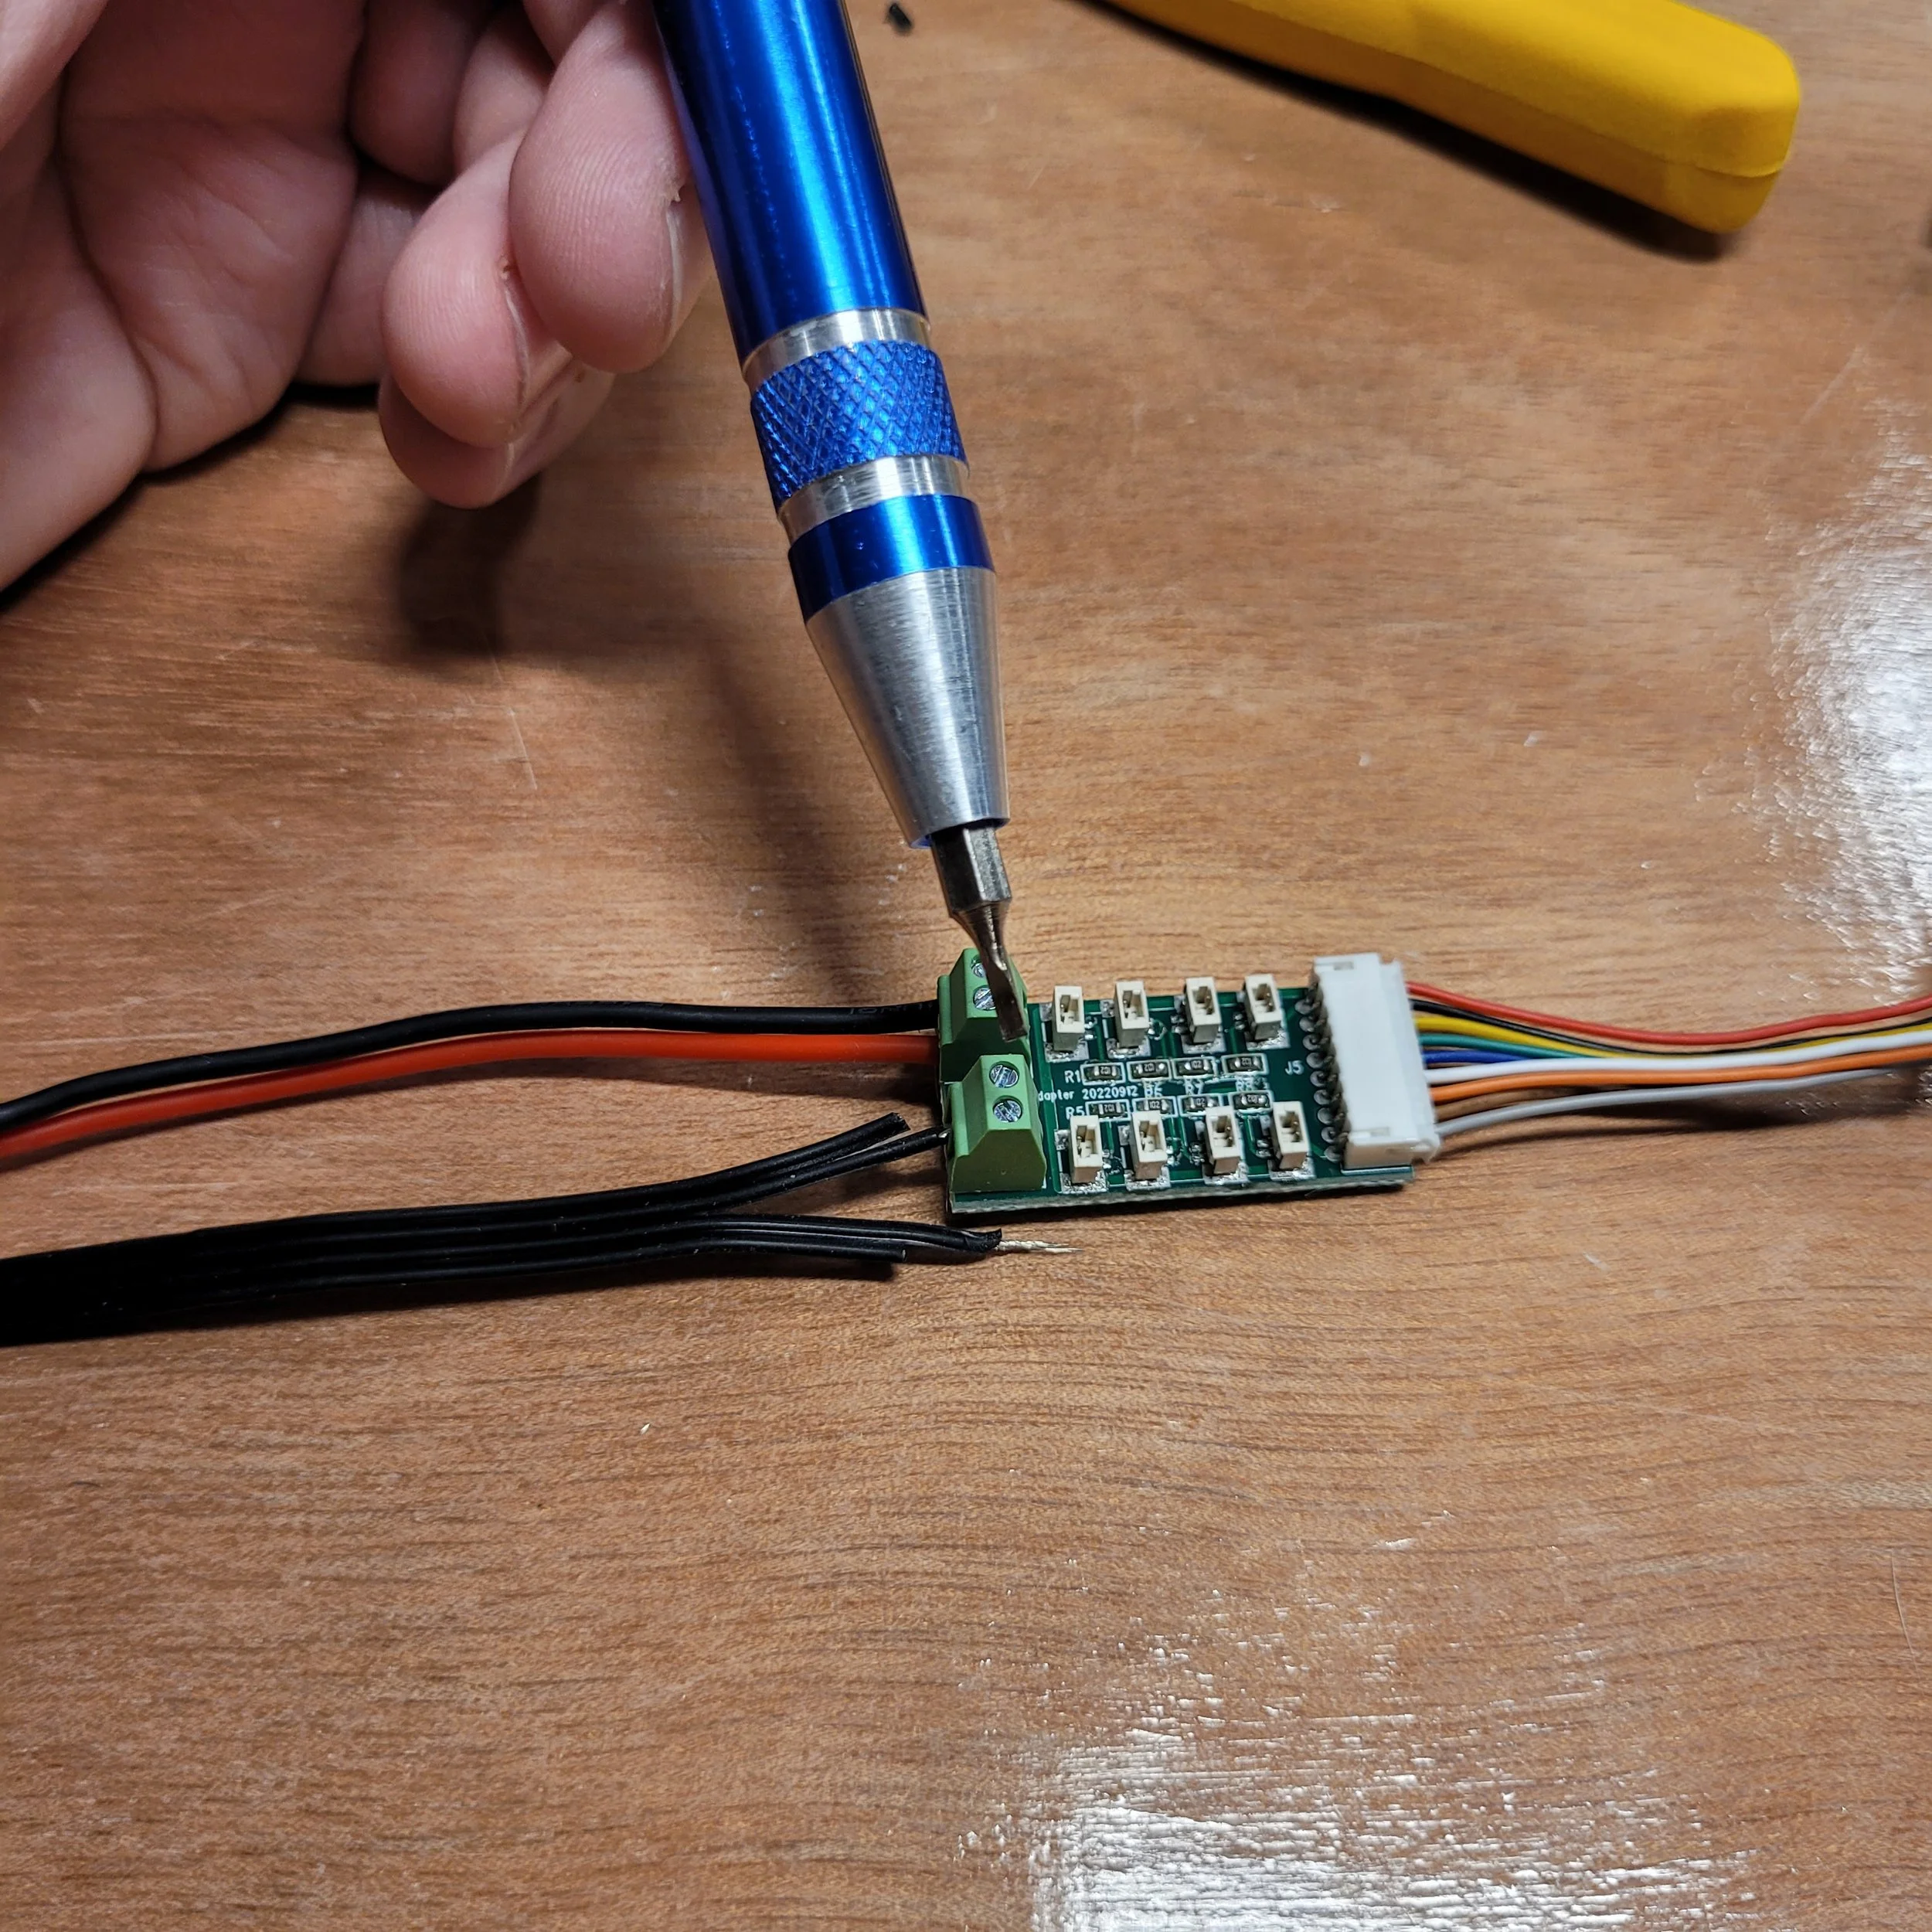
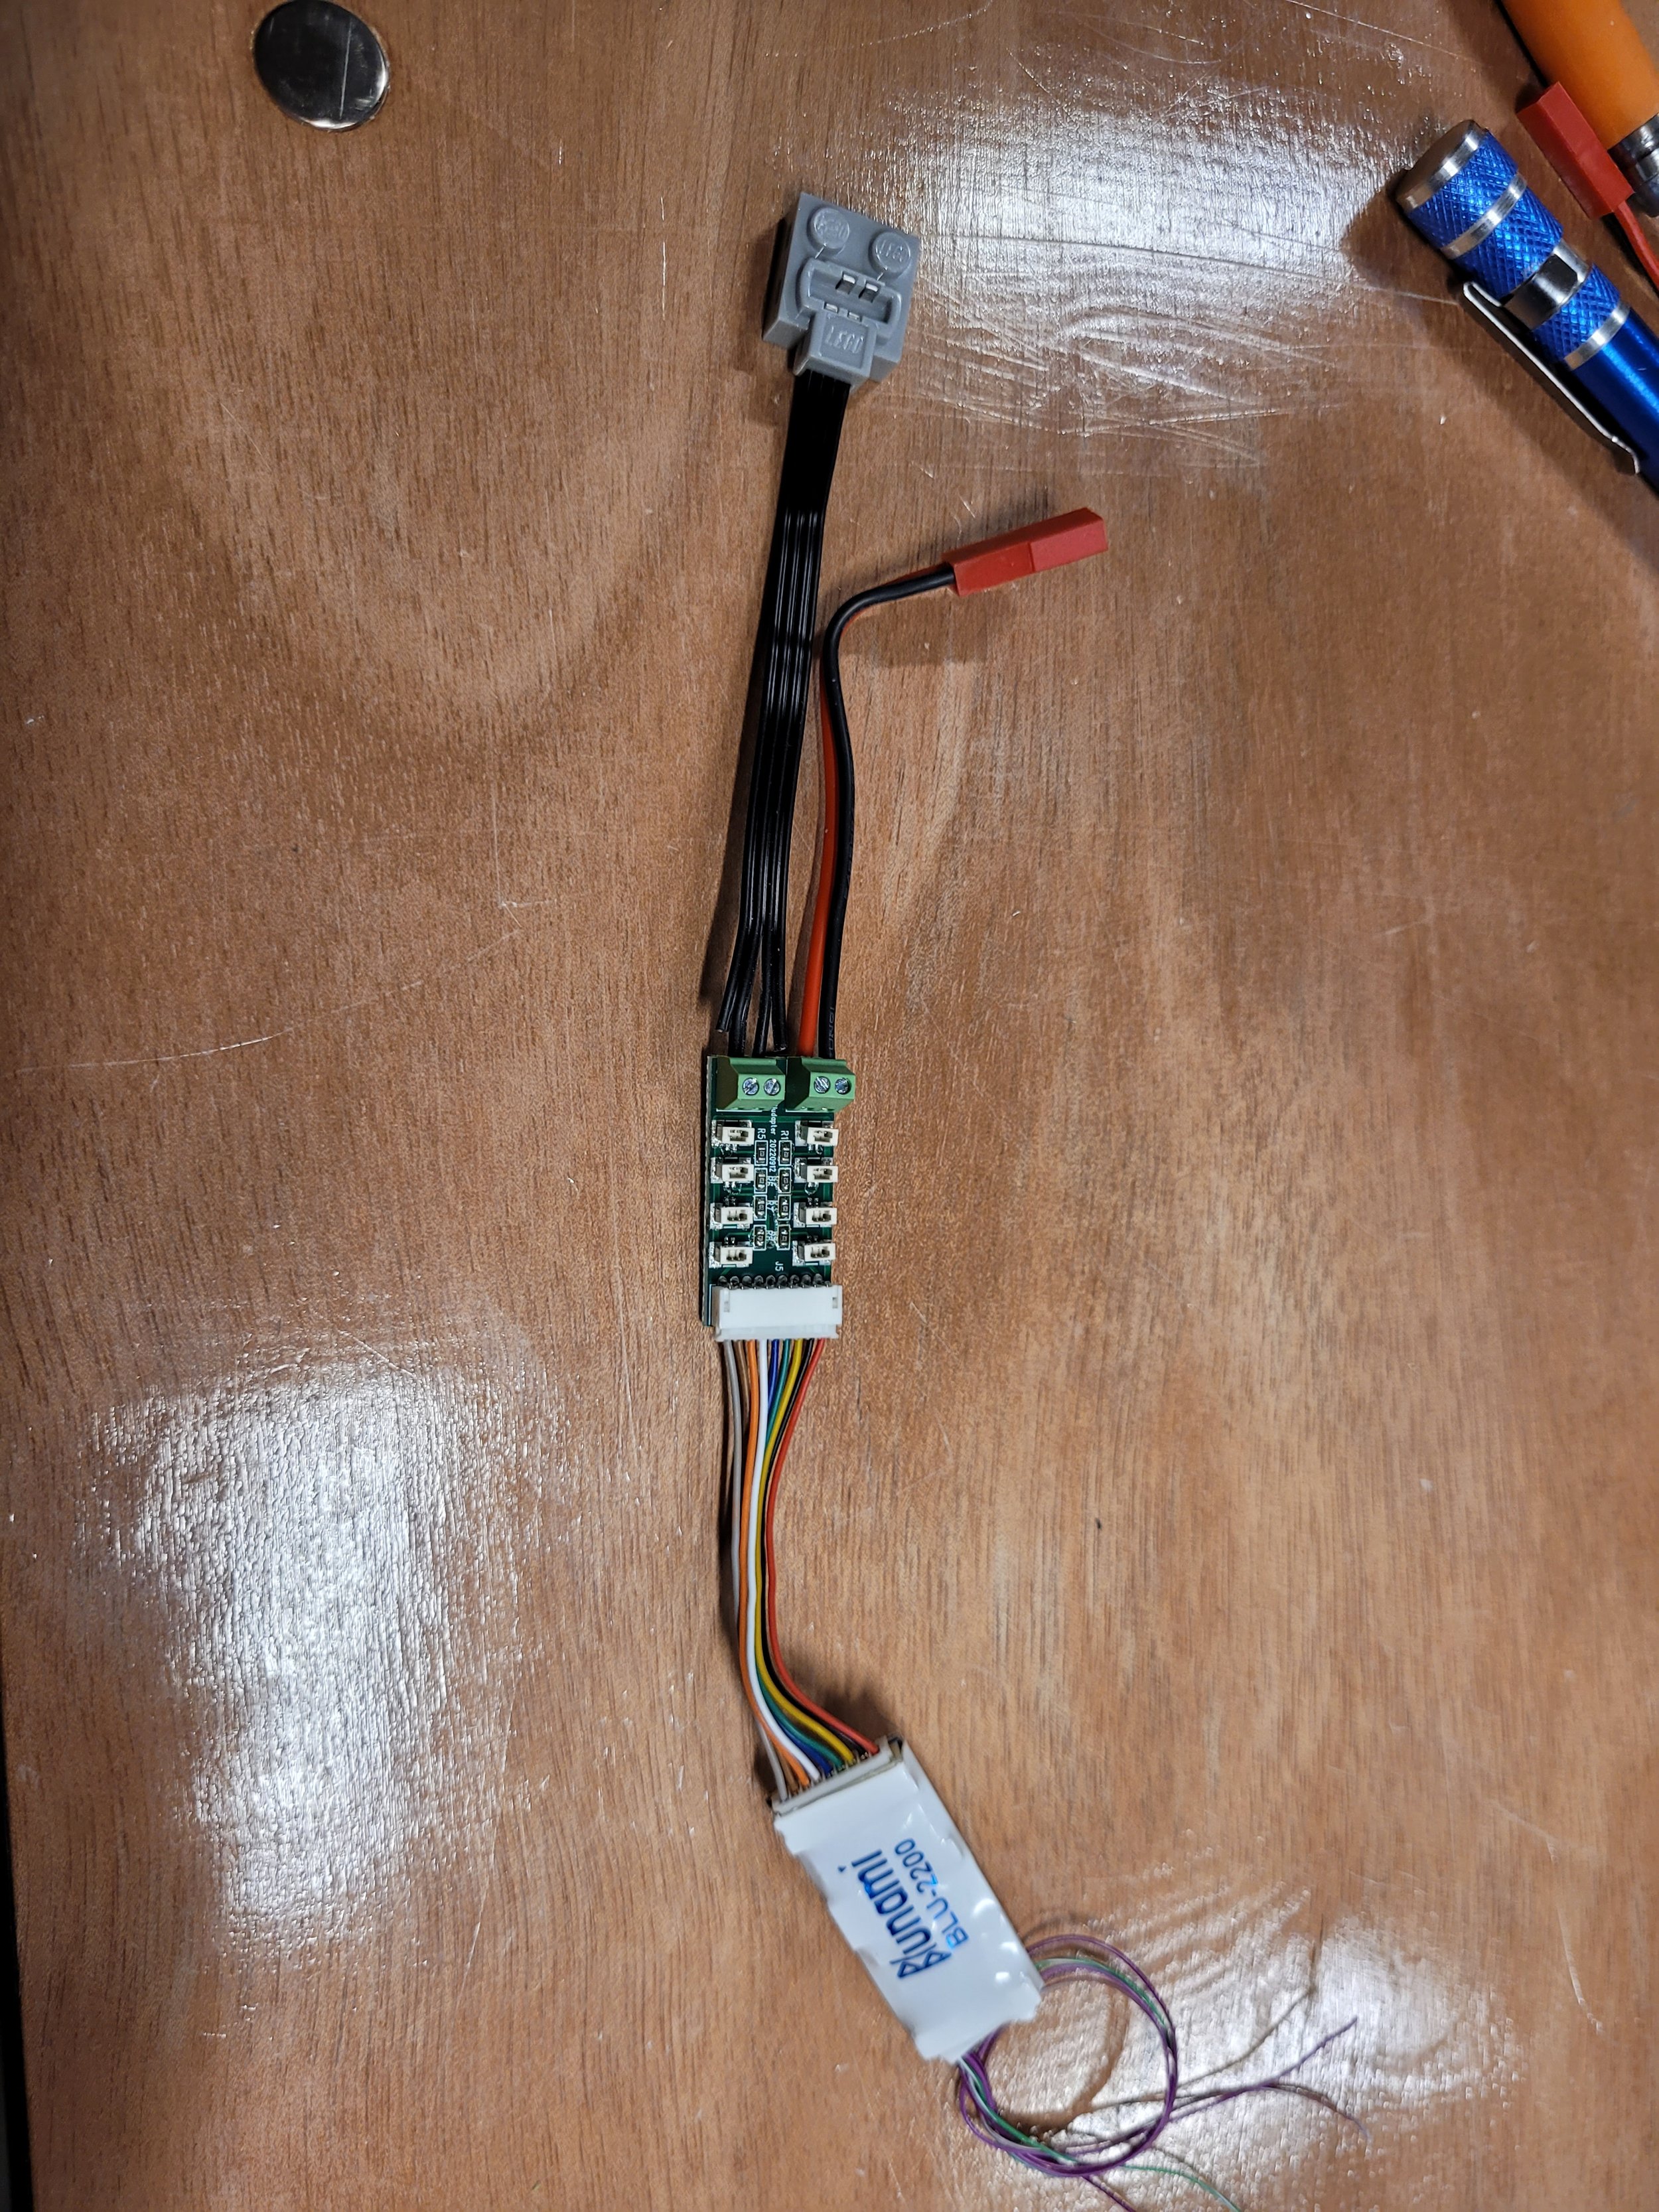
Your 2200 board comes with a pair of wiring harnesses already attached. This is nice, and can be used with a bit of soldering the wire ends, which I’ll briefly touch on in a moment, but there is another way: LifeLites offers a “Bludaptr” board that comes with a similar 9-pin ribbon cable hooked up to a small circuit board with screw terminals and plugs on it. It will be significantly easier to install our wires on the screw terminals and plugs, as opposed to soldering leads to the ends of the standard wiring harnesses, so let’s remove said wiring harnesses. To do this, grab your Xacto blade and CAREFULLY cut away the white plastic wrap around the end of the Blunami board where the wiring harness is attached. IMPORTANT NOTE: CUTTING THE WHITE PLASTIC COVER VOIDS THE SOUNDTRAXX WARRANTY. Once enough plastic is cut away, you can unplug the included wiring harness. This may be easier by using the small screwdriver end, or the Xacto blade to (CAREFULLY) pry out the 9-pin plug. Don’t just pull on the wires, they may separate from the plug itself, making this task more difficult. Once the original 9-pin wiring harness is removed, plug in the replacement 9-pin ribbon wire (which comes included with the Bludaptr) to the Blunami board, with the other end plugged into your Bludaptr board.
If you don’t wish to use the Bludaptr board, and would instead prefer to solder your wires directly to the provided harness that comes pre-installed on the 2200 board, the wiring hookups are as follows:
Black = Black battery lead
Red = Red battery lead
Gray = Motor +
Orange = Motor -
White = Headlight
Yellow = Backup Light
Green = FX3
Brown = FX4
Blue = Function Common (12V)


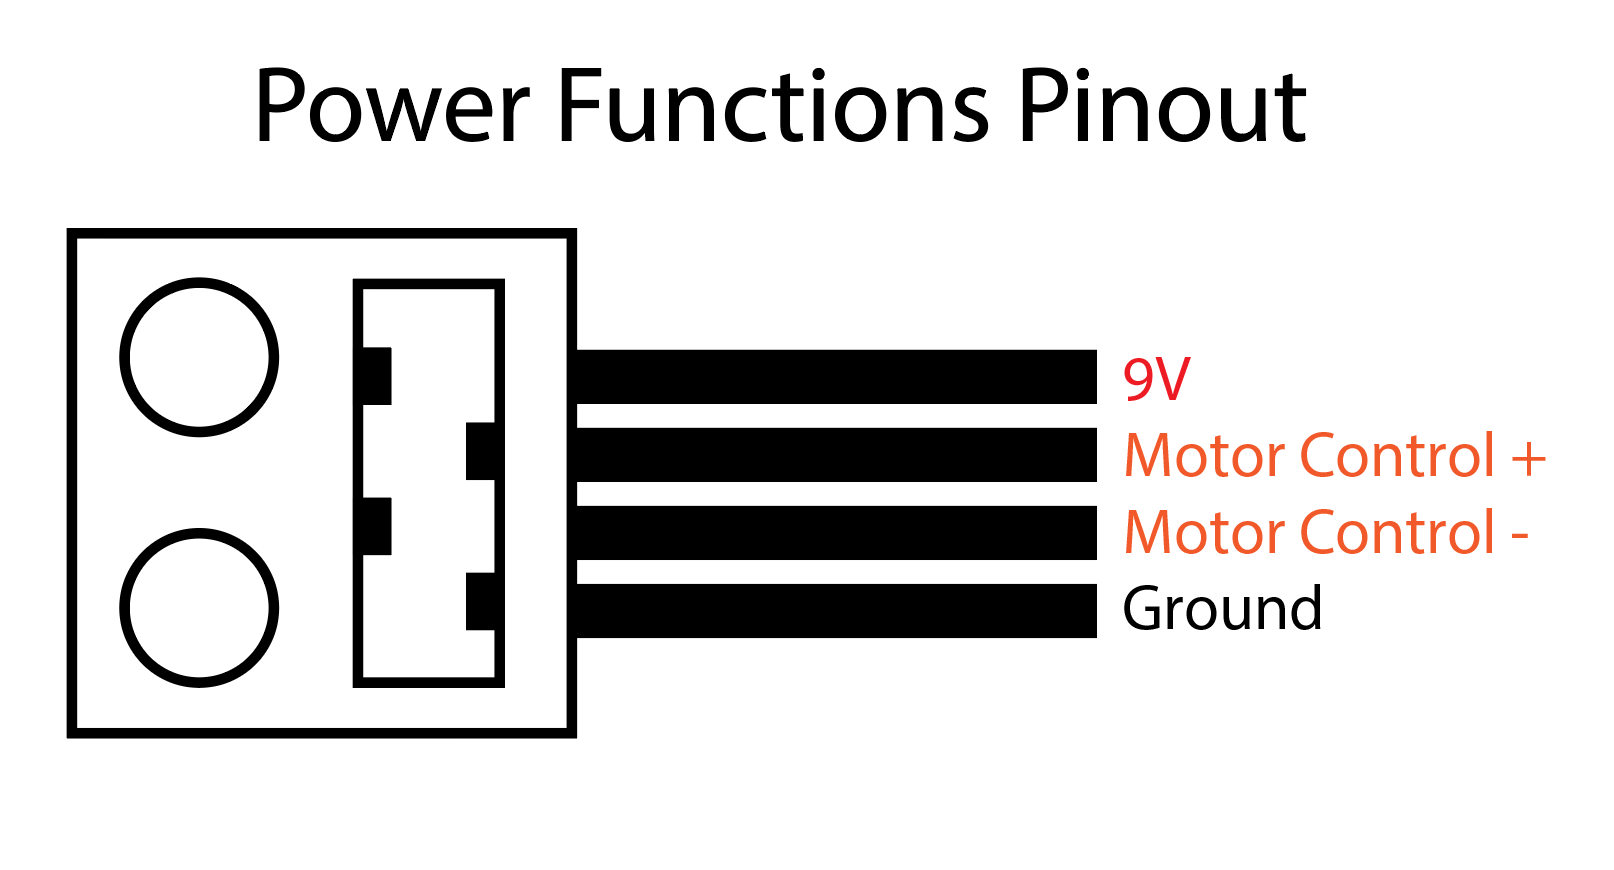
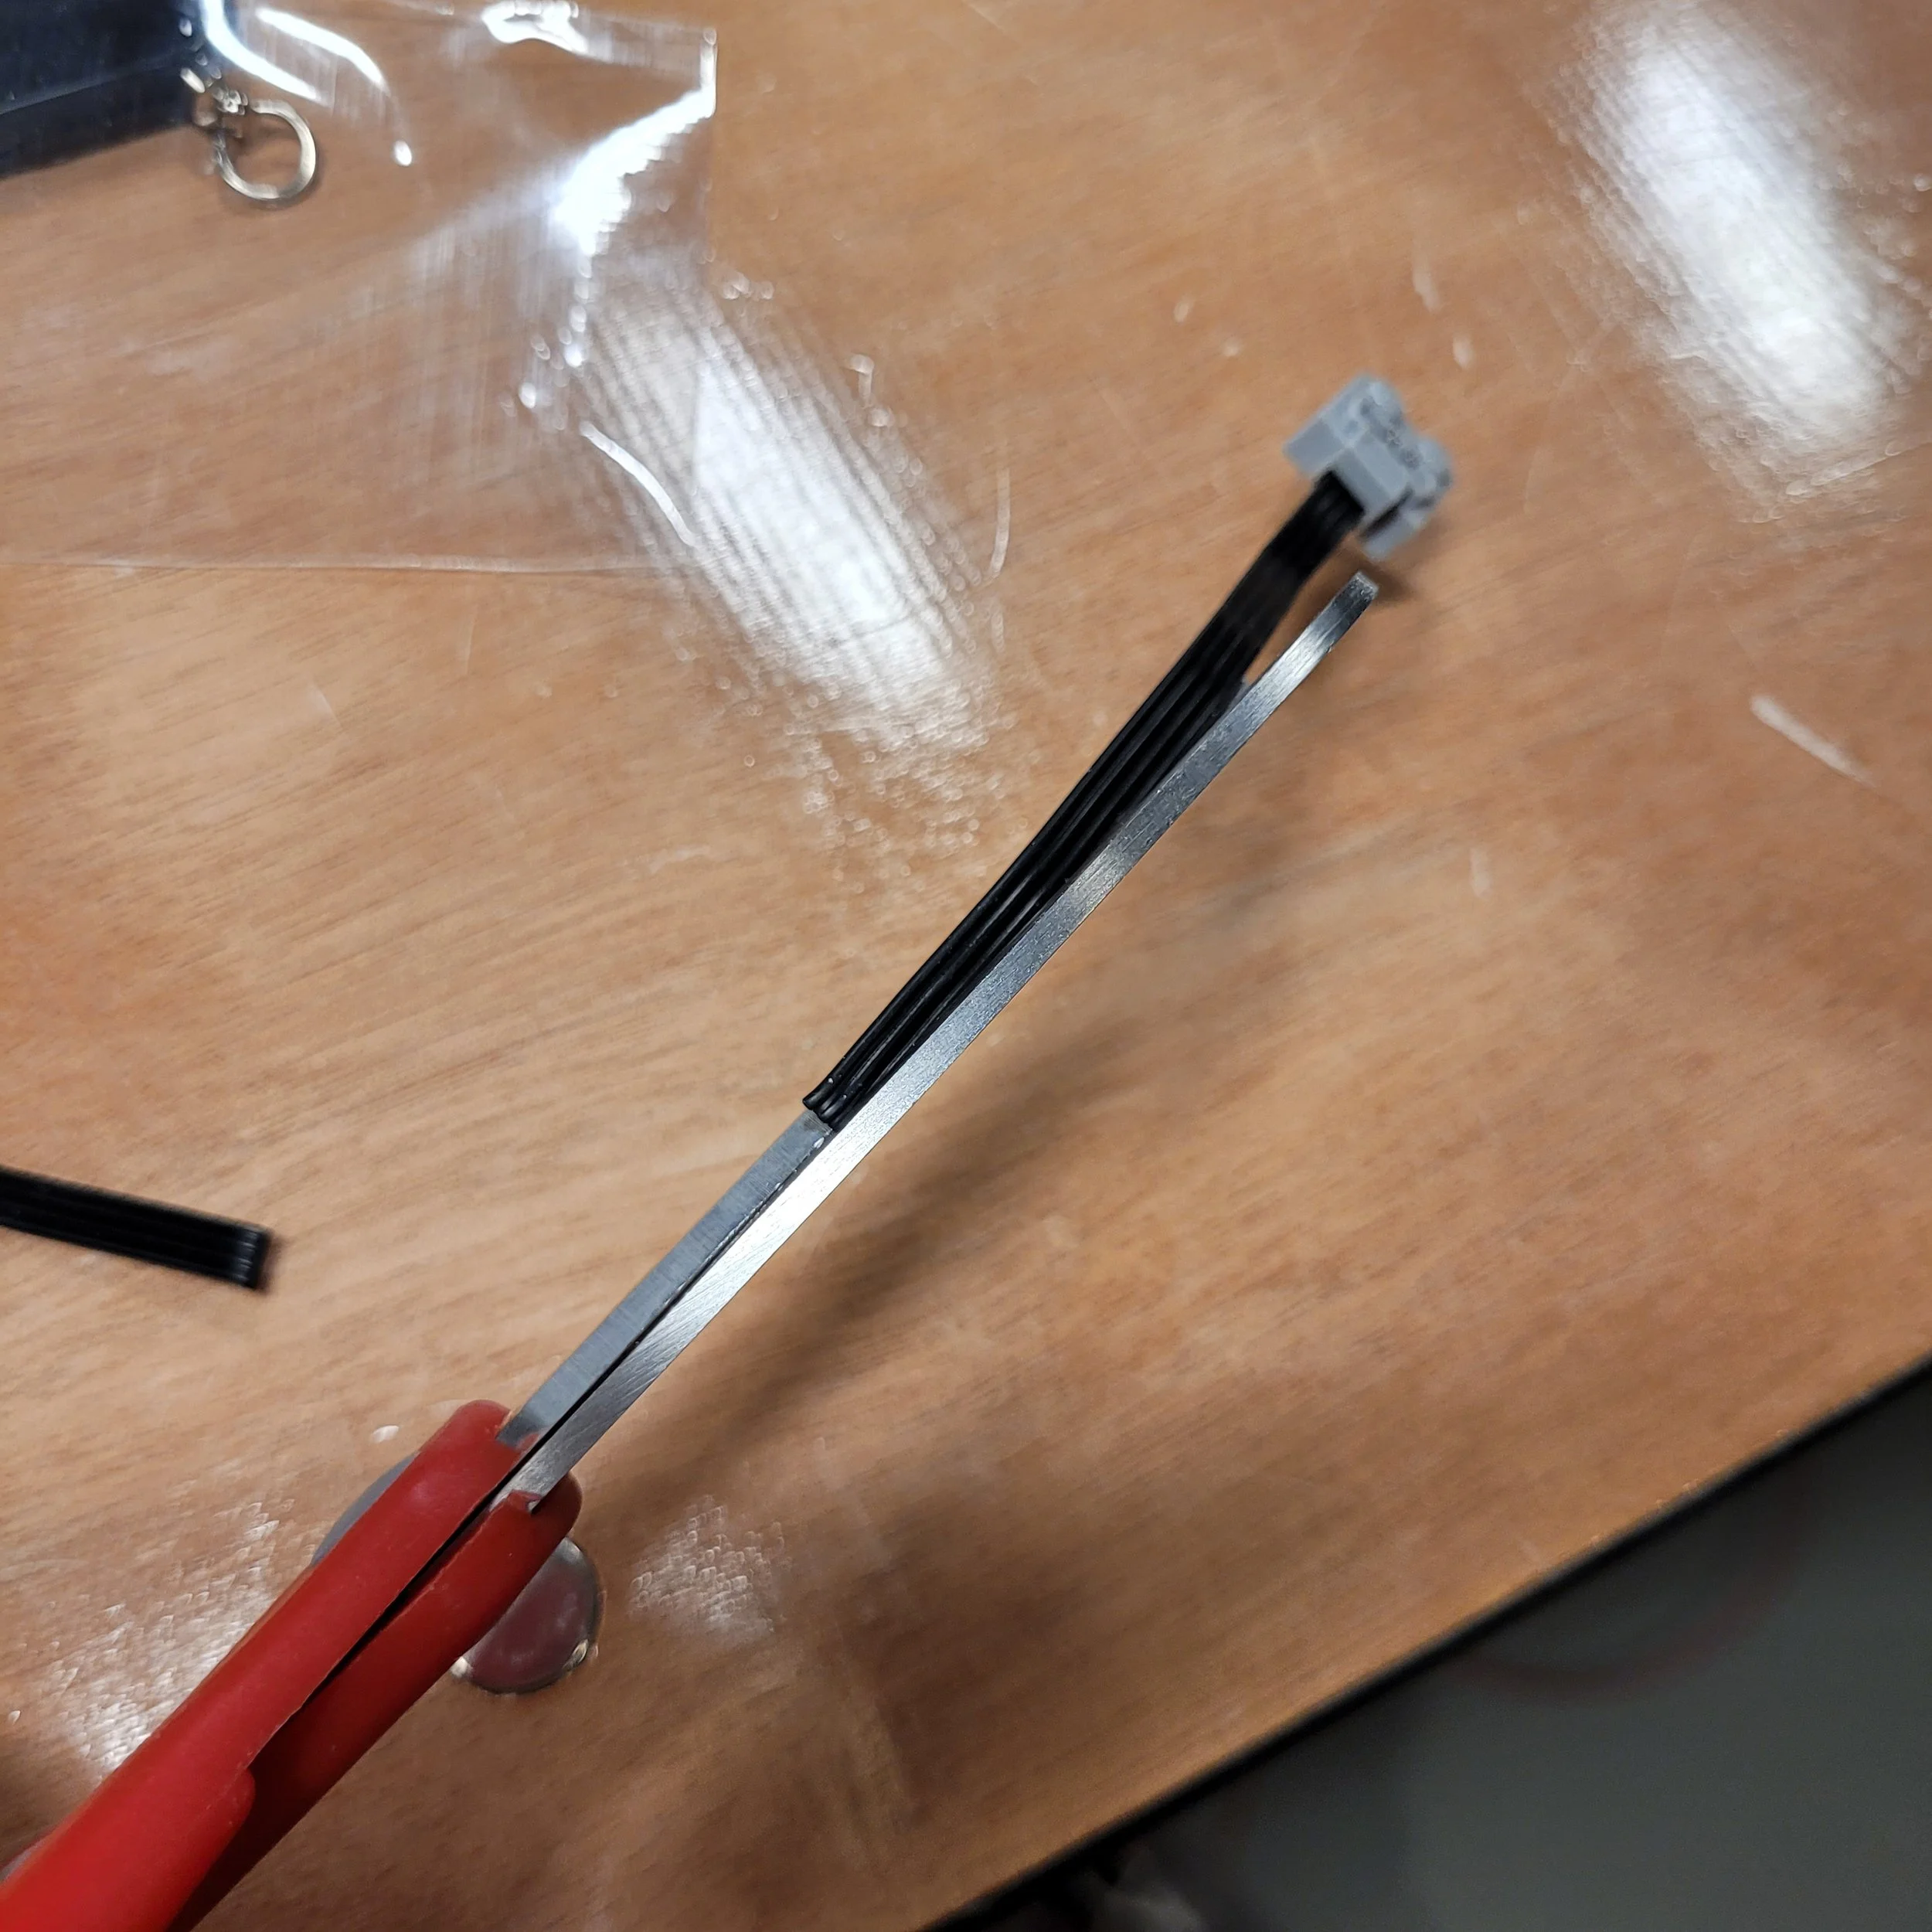
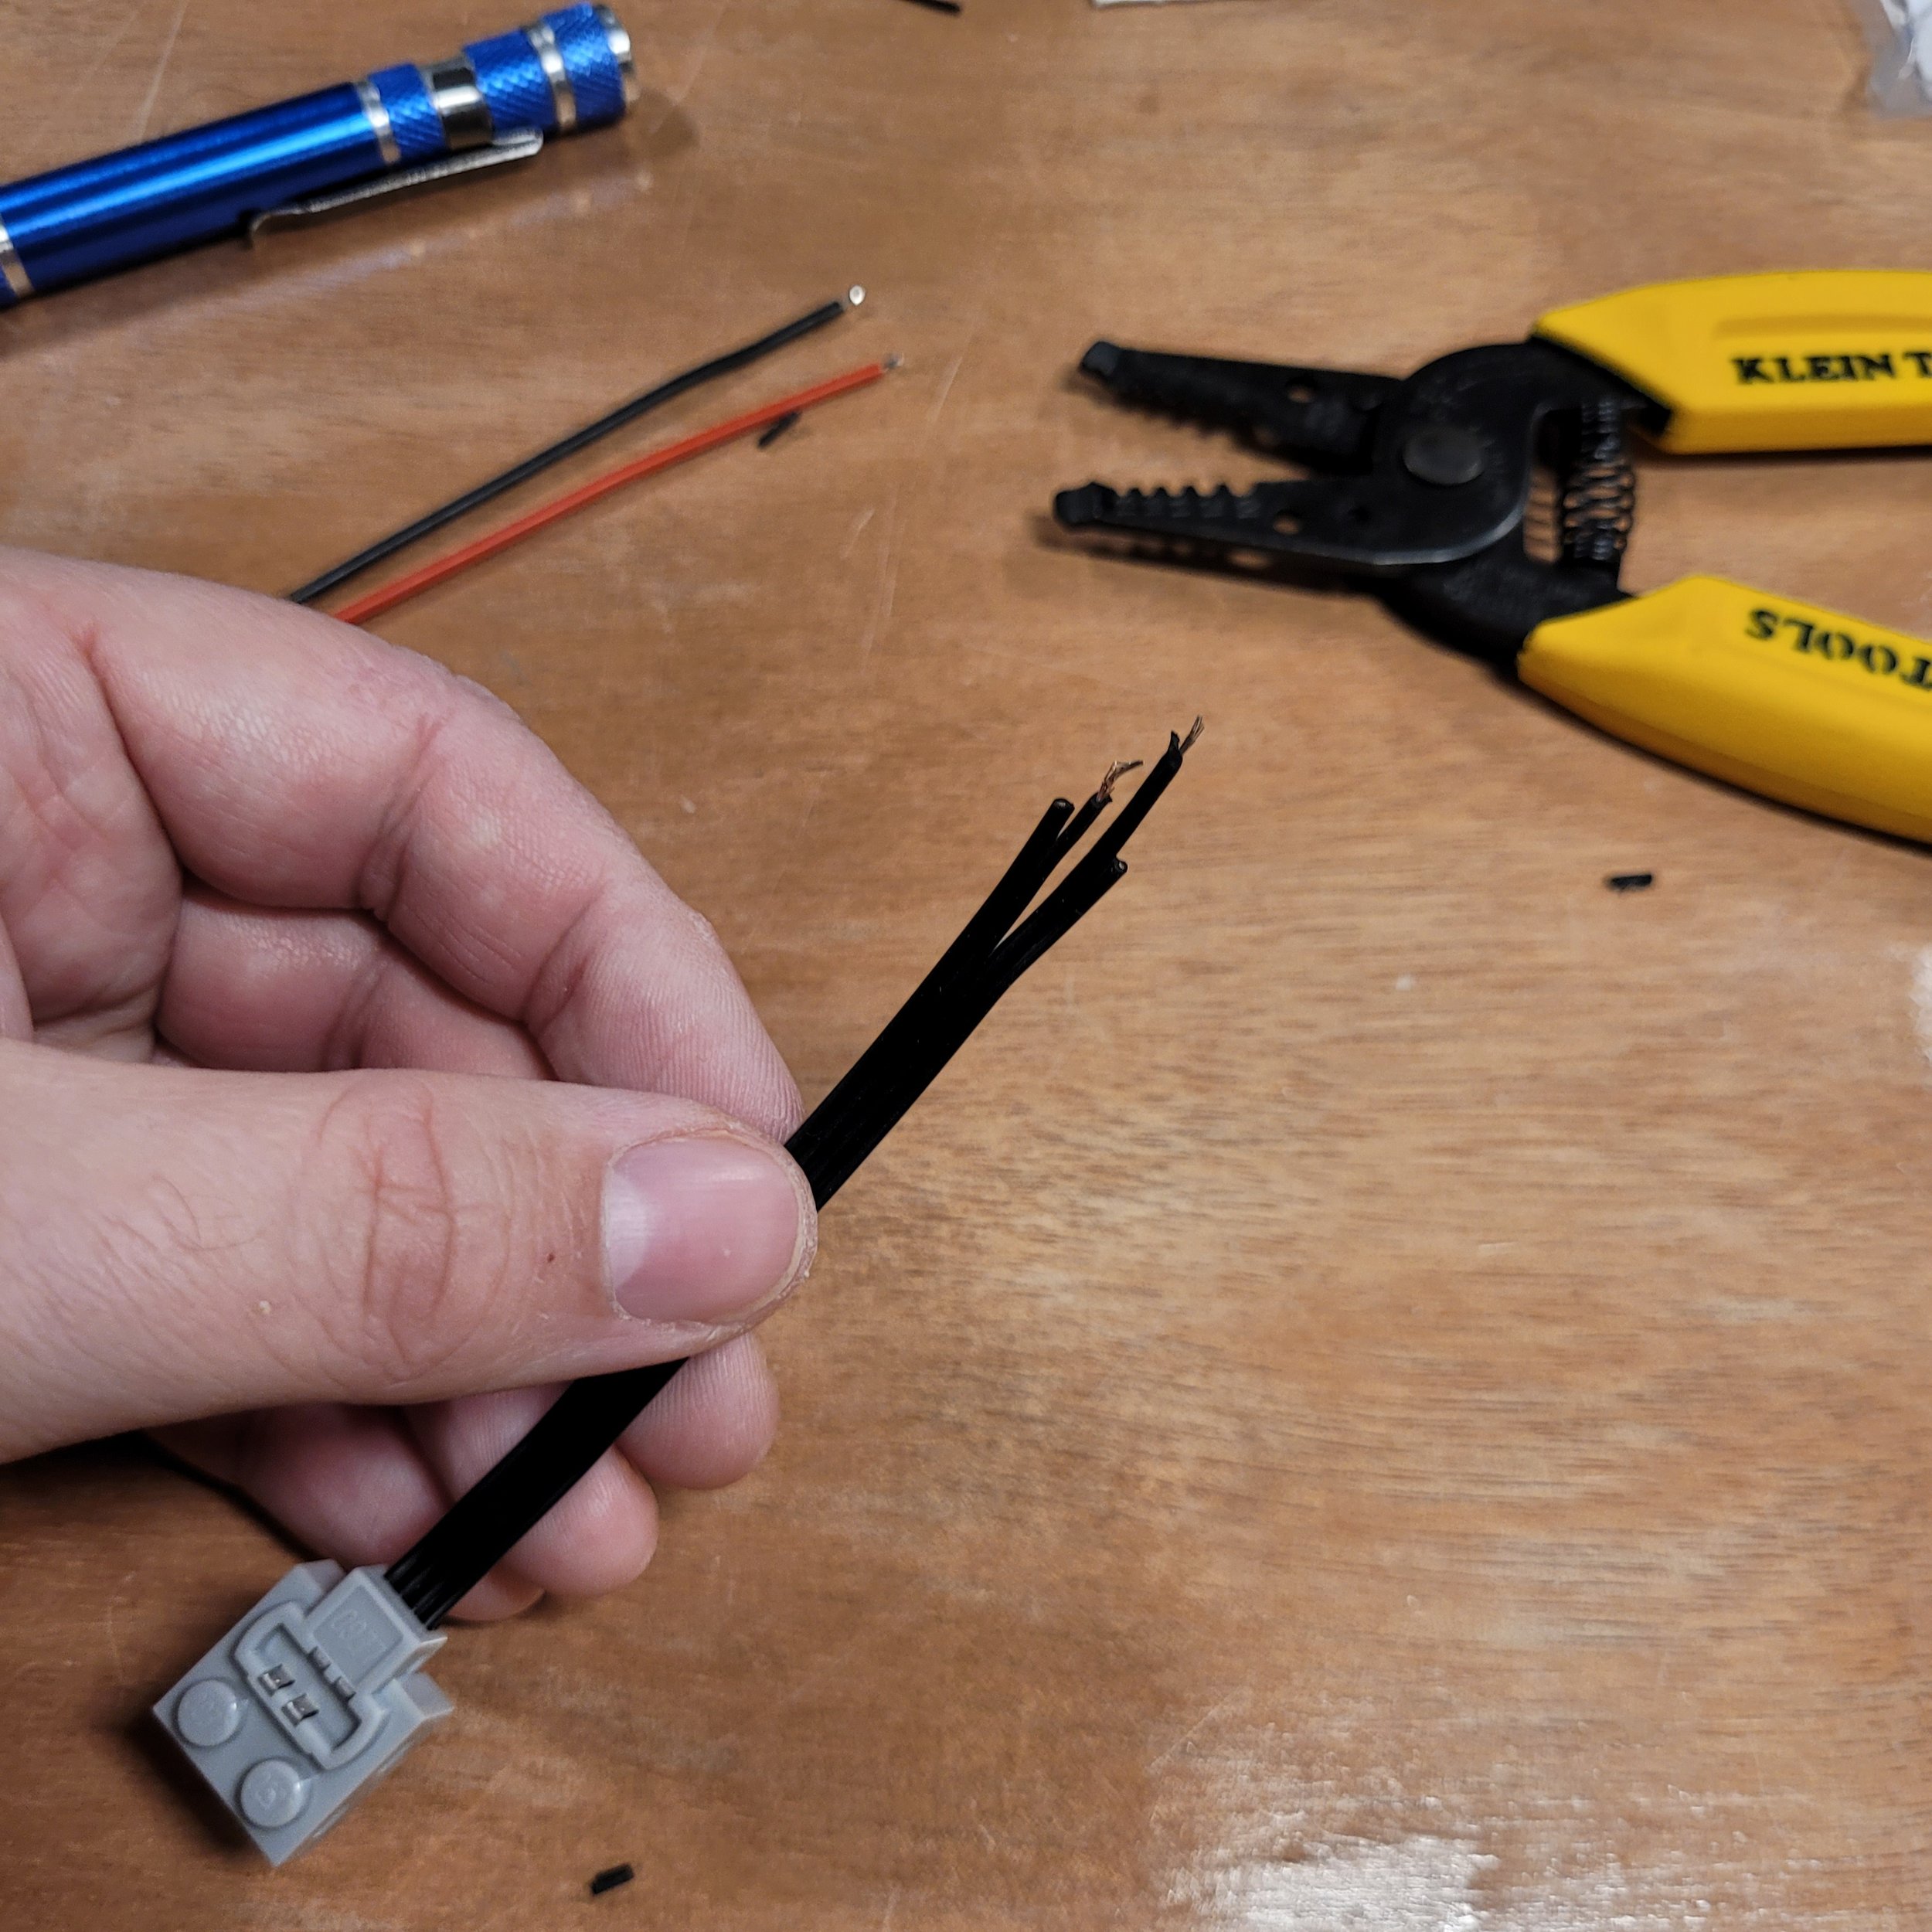
Next, we will need to wire in the motors to the corresponding terminals. I’m using Power Functions motors. You COULD cut off the PF plugs from your motors and wire them directly into the board, but I prefer to use a third PF plug with a few inches or so of wire remaining for flexibility. The control channels are the two inside wires of the four on the PF plug. If you’re using a Powered Up motor, the pinout is a bit different. See the diagrams below.

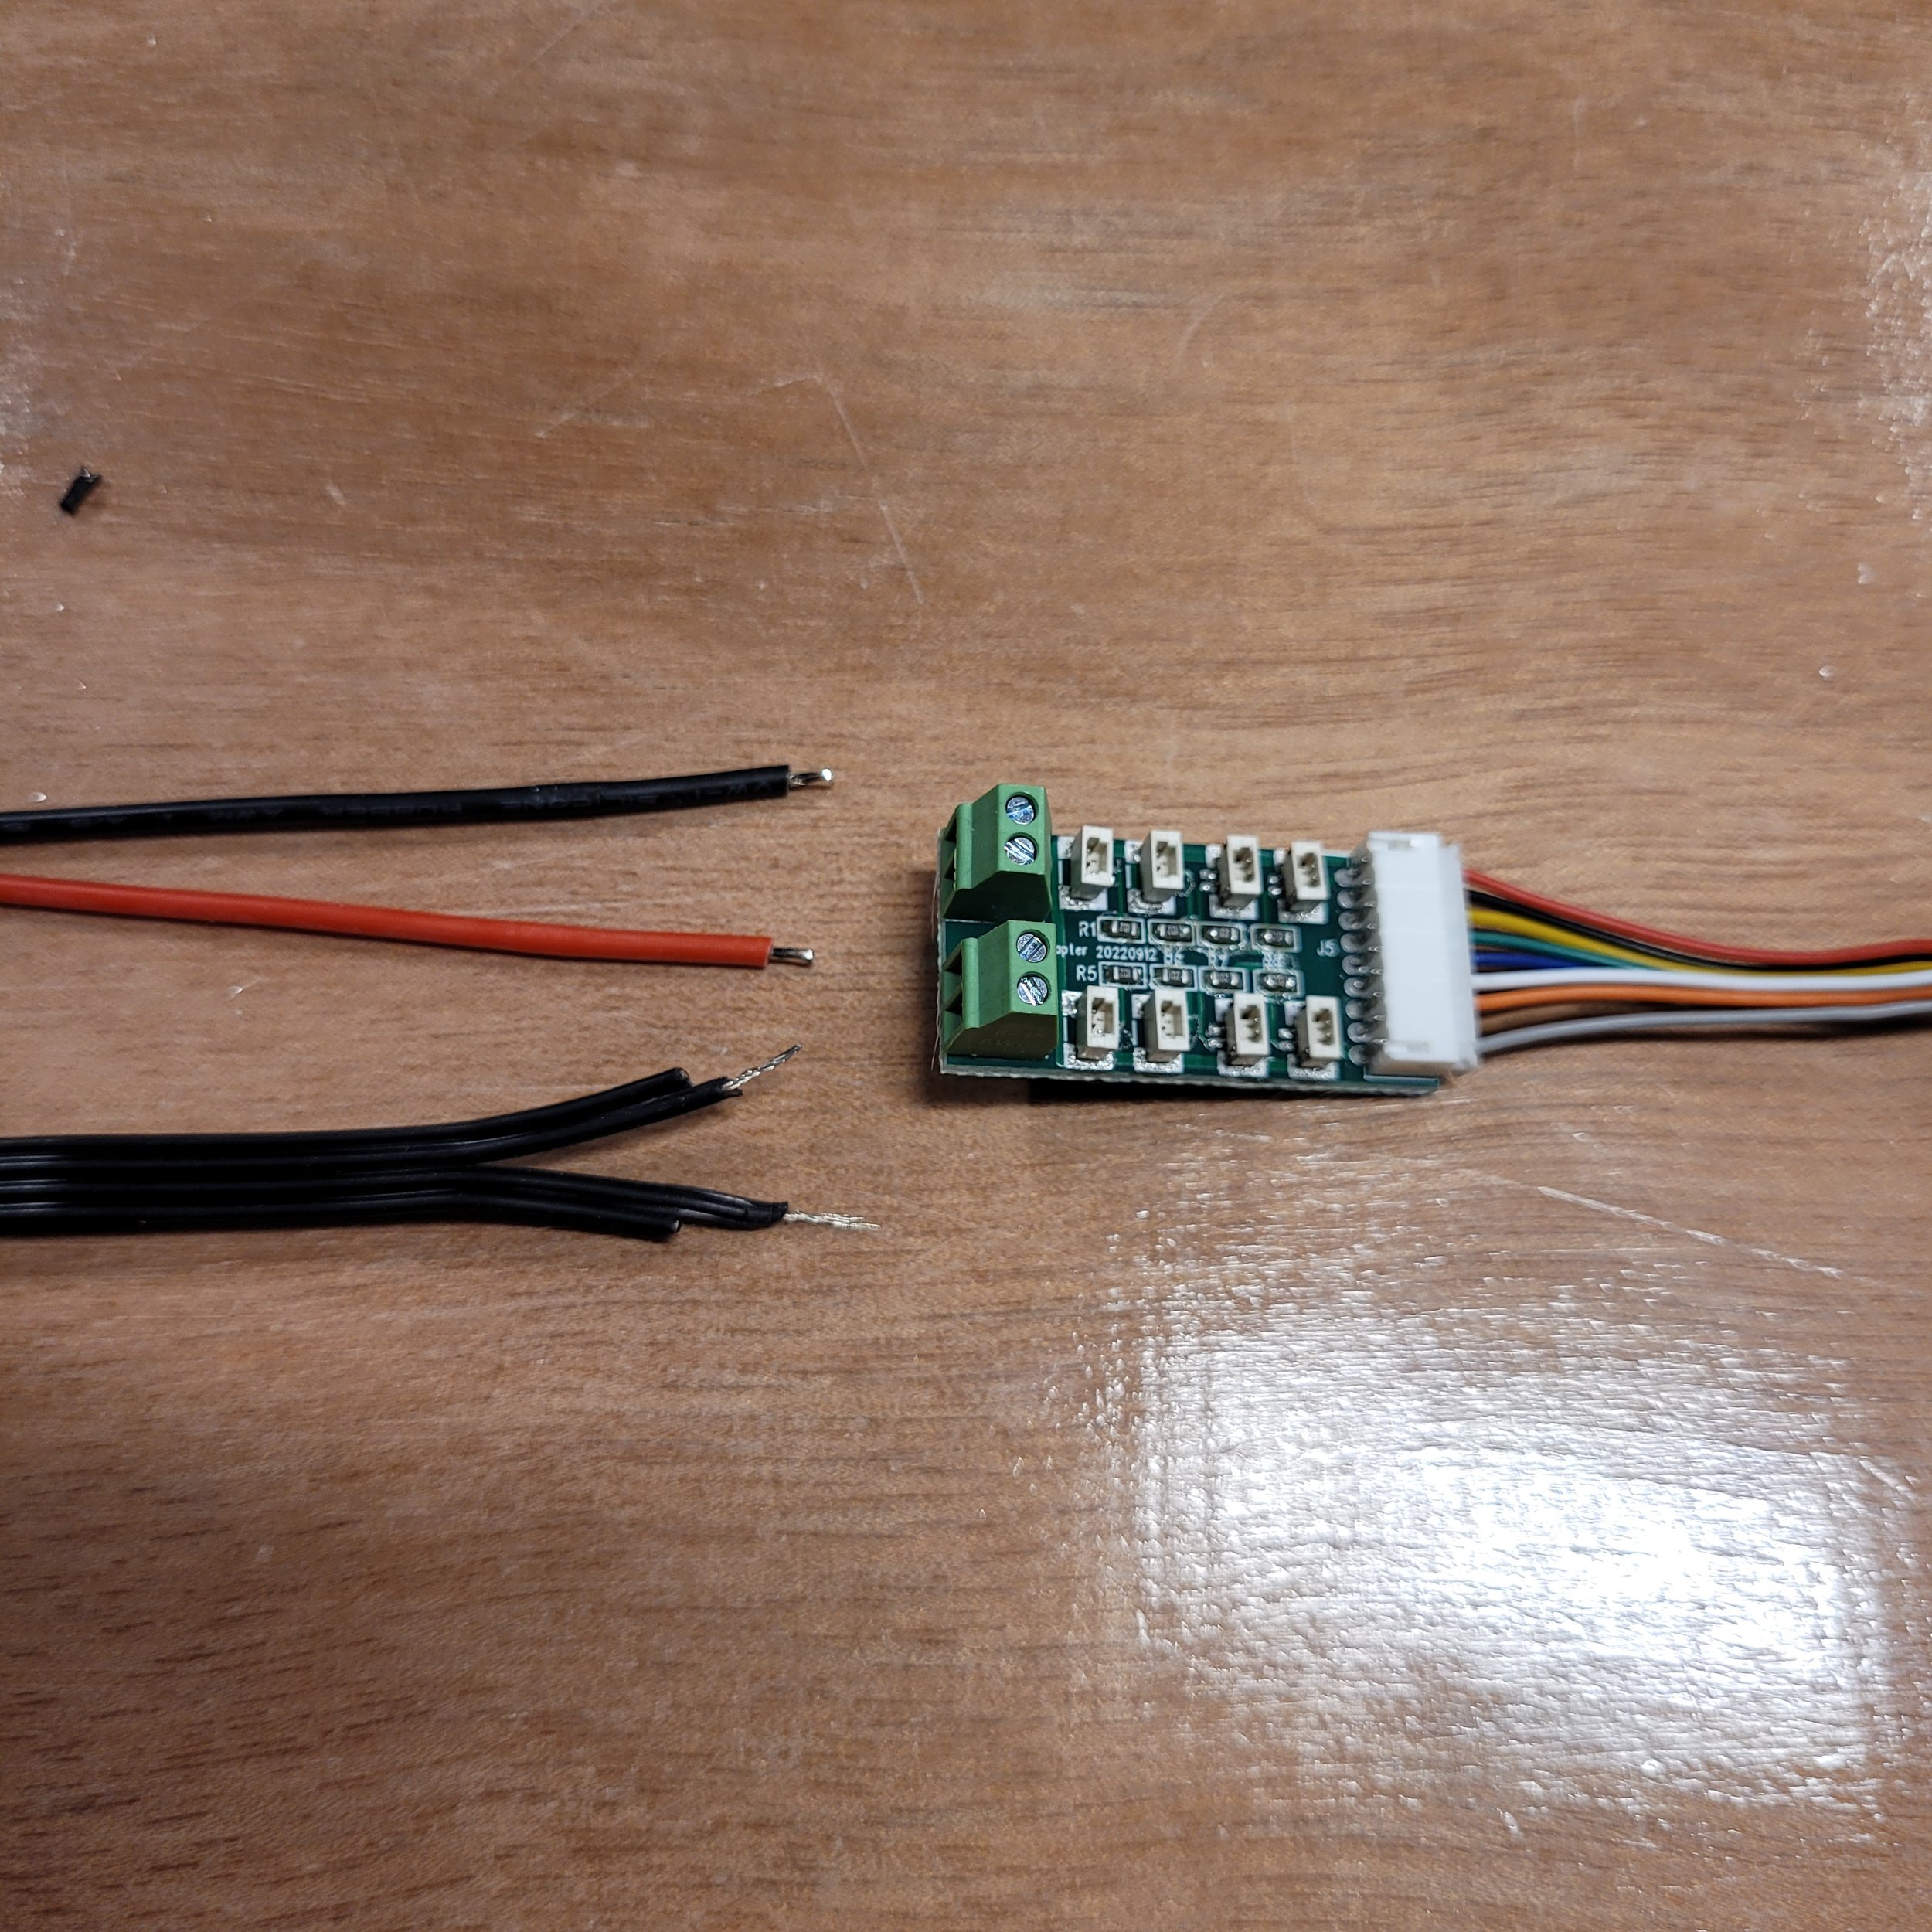
Strip the rubber coating off the last half-centimer-ish of wire and screw these into the bottom two terminals on the Bludaptr board. Note that the orientation of these two wires determines which way is forwards and backwards for your locomotive. When you’ve got the app running (later down this page) and you find that setting movement for “forwards” results in the locomotive moving backwards, simply flip these two Power Functions wires around in the motor screw sockets.
Now for the battery lead. I use LiPo batteries with a JST plug, so I purchased a pack of JST female plugs with wire tails to put in my locomotives. Cut off the excess wire, again leaving yourself a few inches for flexibility, and again strip off the last half-centimeter-ish of wire. Screw these into the top two wire screw terminals on the Bludaptr board, with the black wire to the outside and the red wire to the inside.


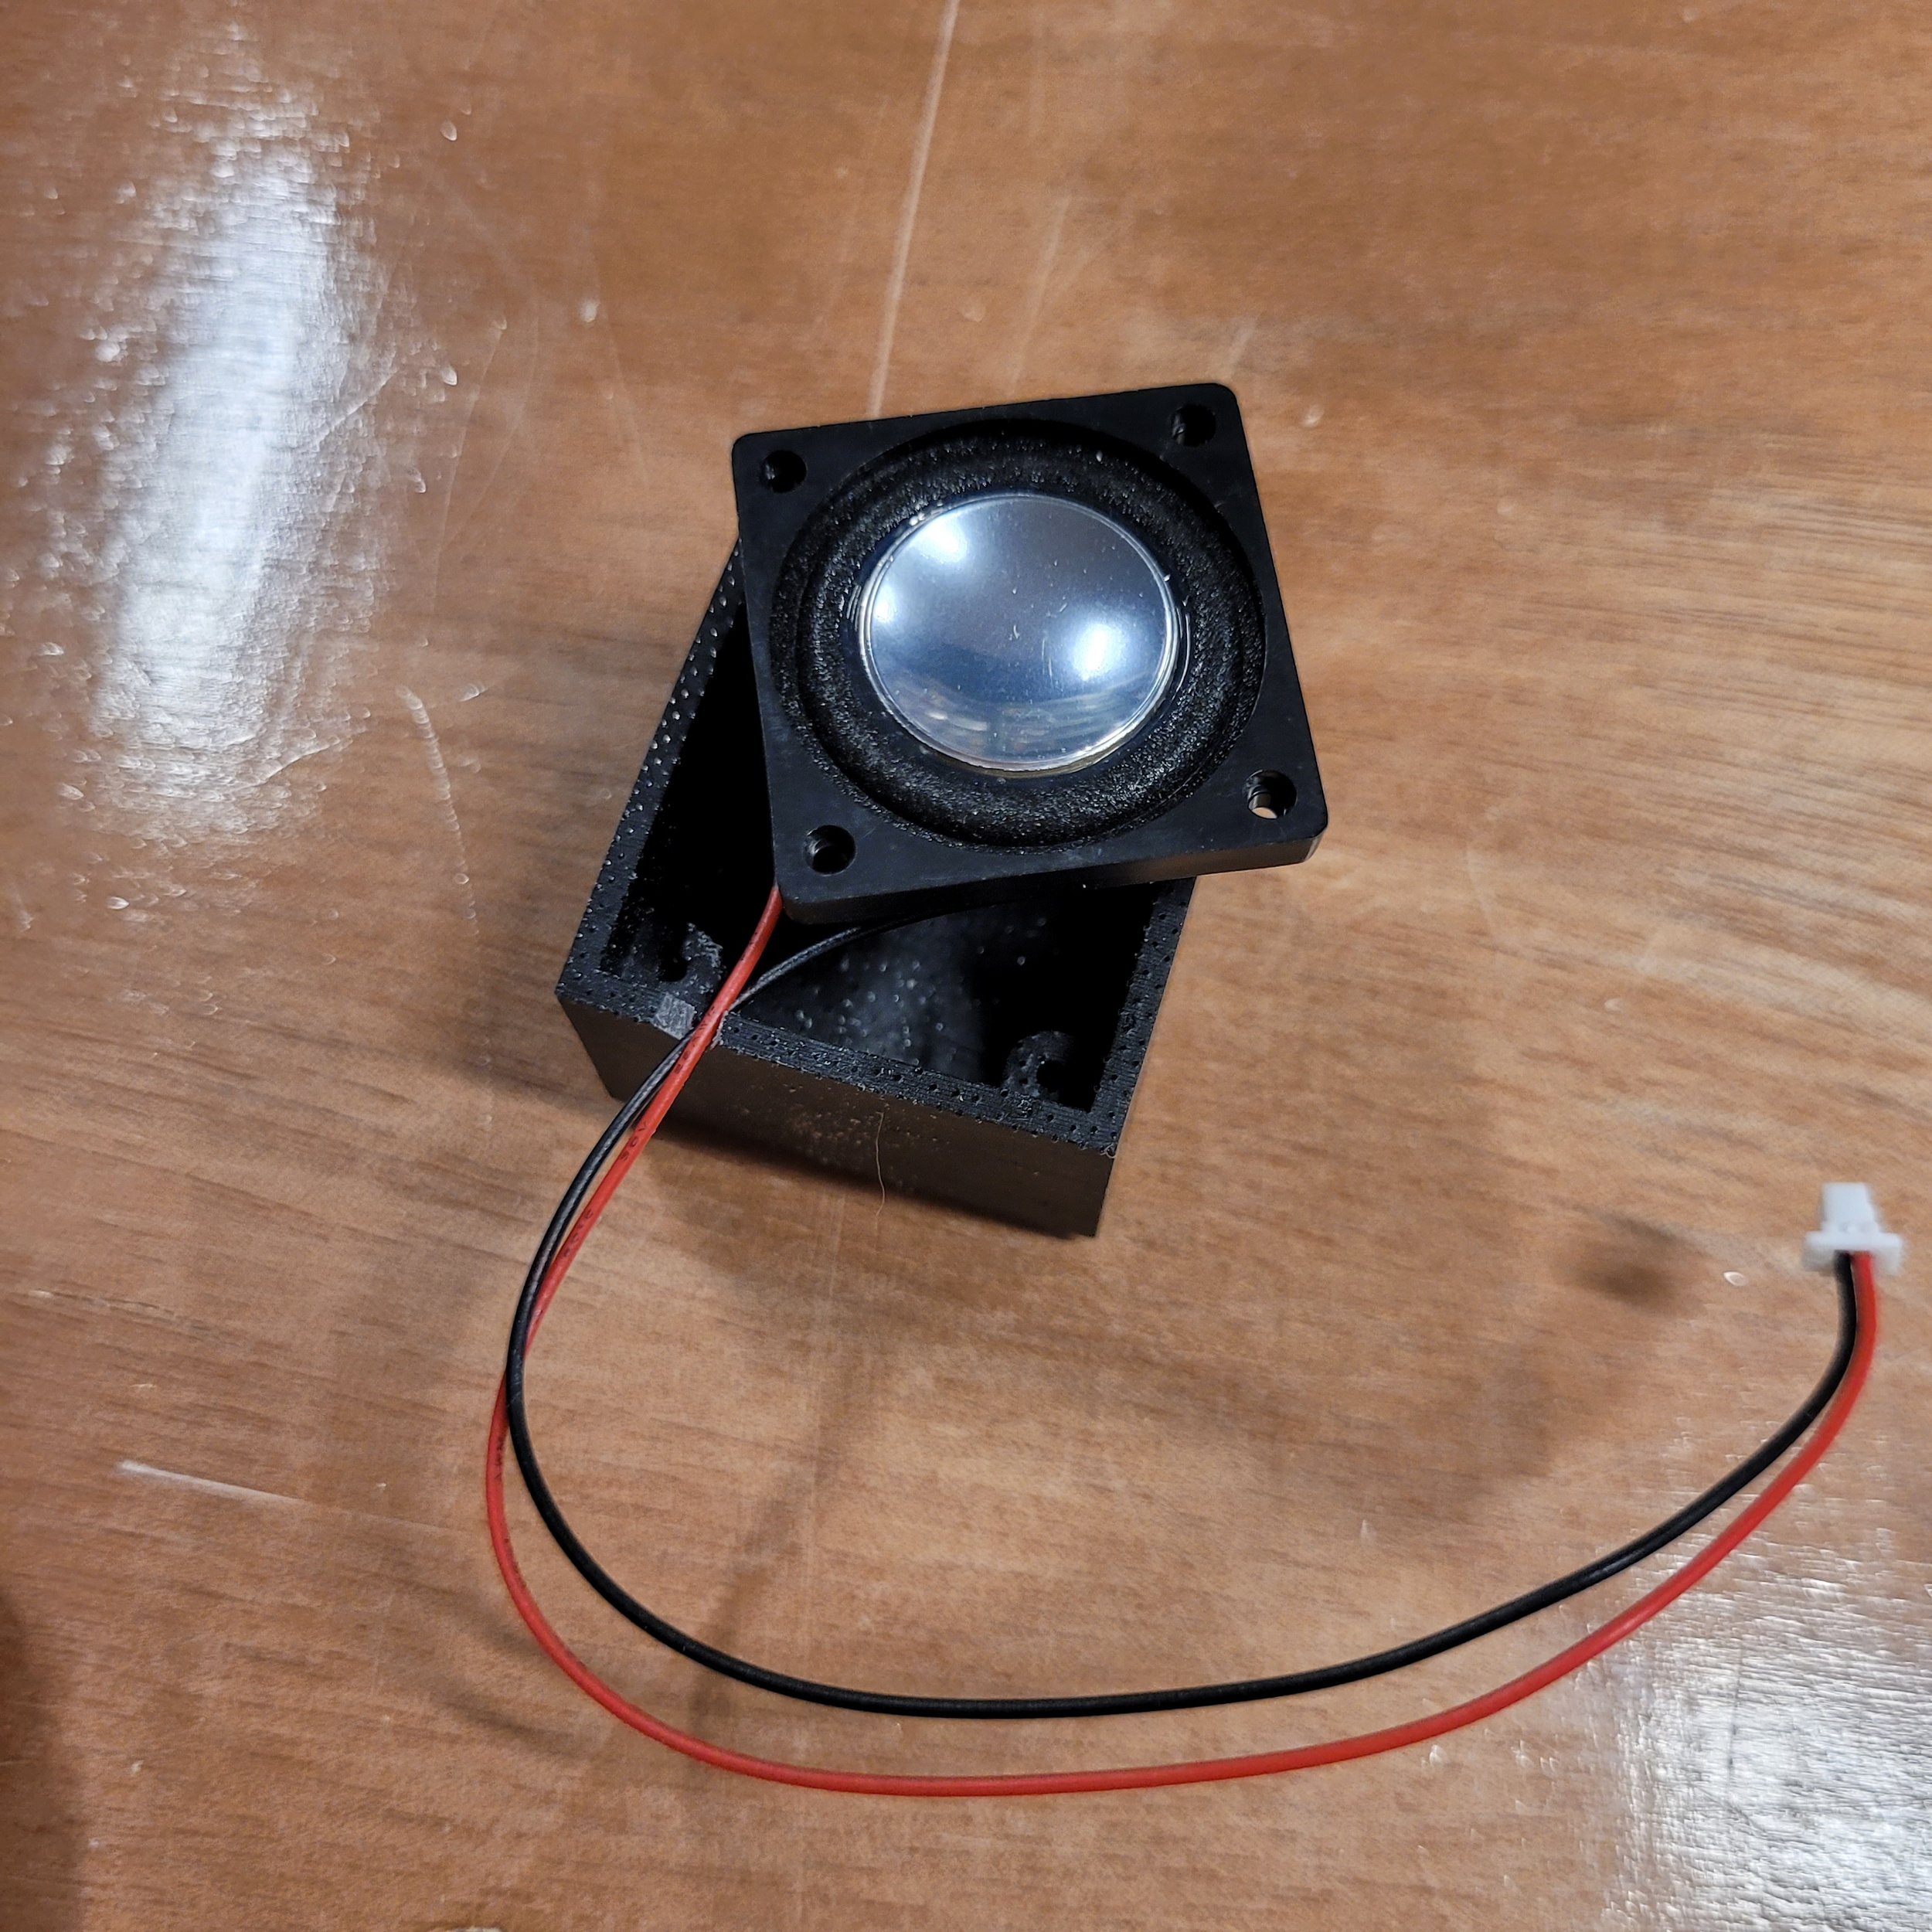
Finally, we need to install the speaker. LifeLites also sells a 3D-printed Lego-compatible housing for both the 23mm and 28mm speakers offered by Soundtraxx. I’m using the 28mm speaker, the housing for which is 4x4 studs side to side and 2 bricks high. There is a small cutout in one side of the bottom of the speaker housing for the wire to pass through. Hold the speaker wire in that spot, and press-fit the speaker into the housing. Now you have a speaker wire tail you can route up through the hole in the locomotive to meet the Blunami board. I would recommend taping the wire to the side of the speaker housing to ensure it doesn’t sag over time and one day catch on something while the train is running, which could rip the wire.
Once again take your Xacto blade and CAREFULLY cut away the plastic wrap on the opposite end of the board from the 9-pin wiring harness to reveal this 4-pin plug, which will need its 4-pin wiring harness removed in a similar manner to the 9-pin we removed earlier. The speaker plug will go in the right-hand 2 pins of this 4-pin plug when the board is facing up.
If you prefer not to cut away the 4-pin wiring harness and instead solder your wires together, the wiring hookups are as follows:
Purple = Speaker +
Purple = Speaker - (there are two purple wires, doesn’t matter which is which)
Green = FX3
Brown = FX4
Green/White Stripe = FX5
Brown/White Stripe = FX6


I don’t personally use lights in my locomotives, at least not right now, but if you do, this is the time to plug in your lights to the various FX outputs of the Bludaptr board. I am considering using lights in my locomotives, and once I do, I will edit this passage with more detail about plugging in the lights.
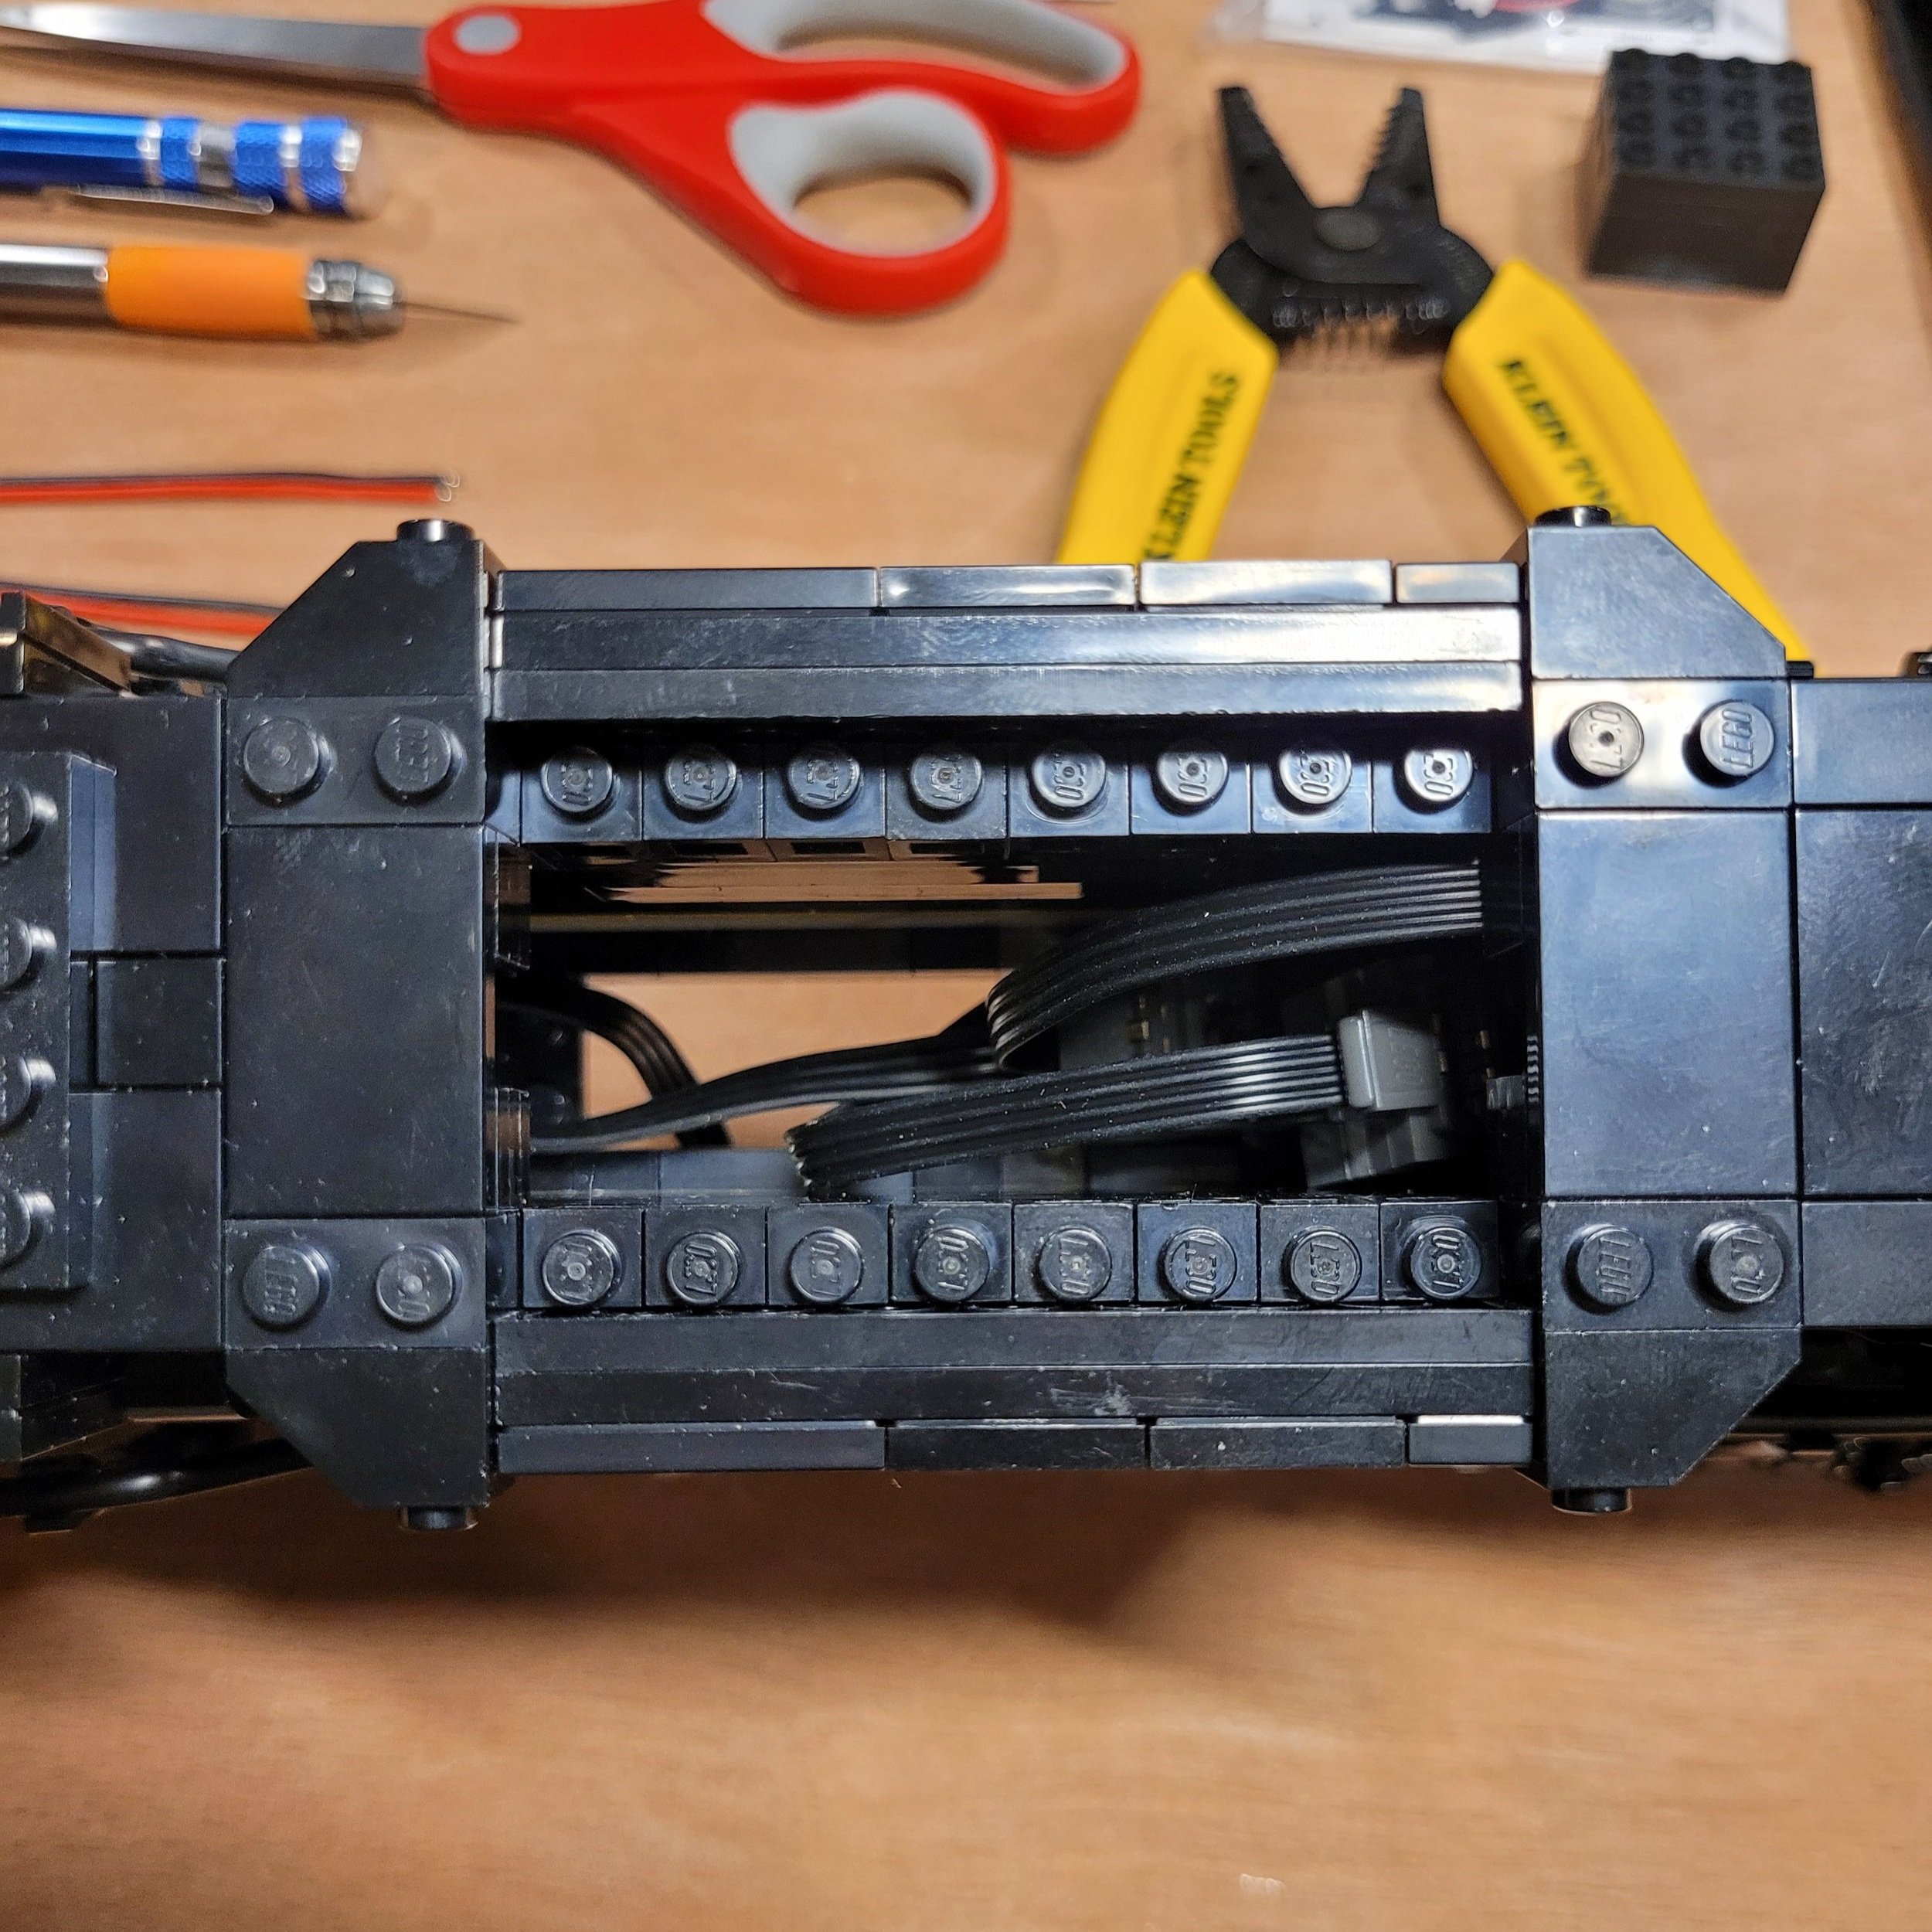
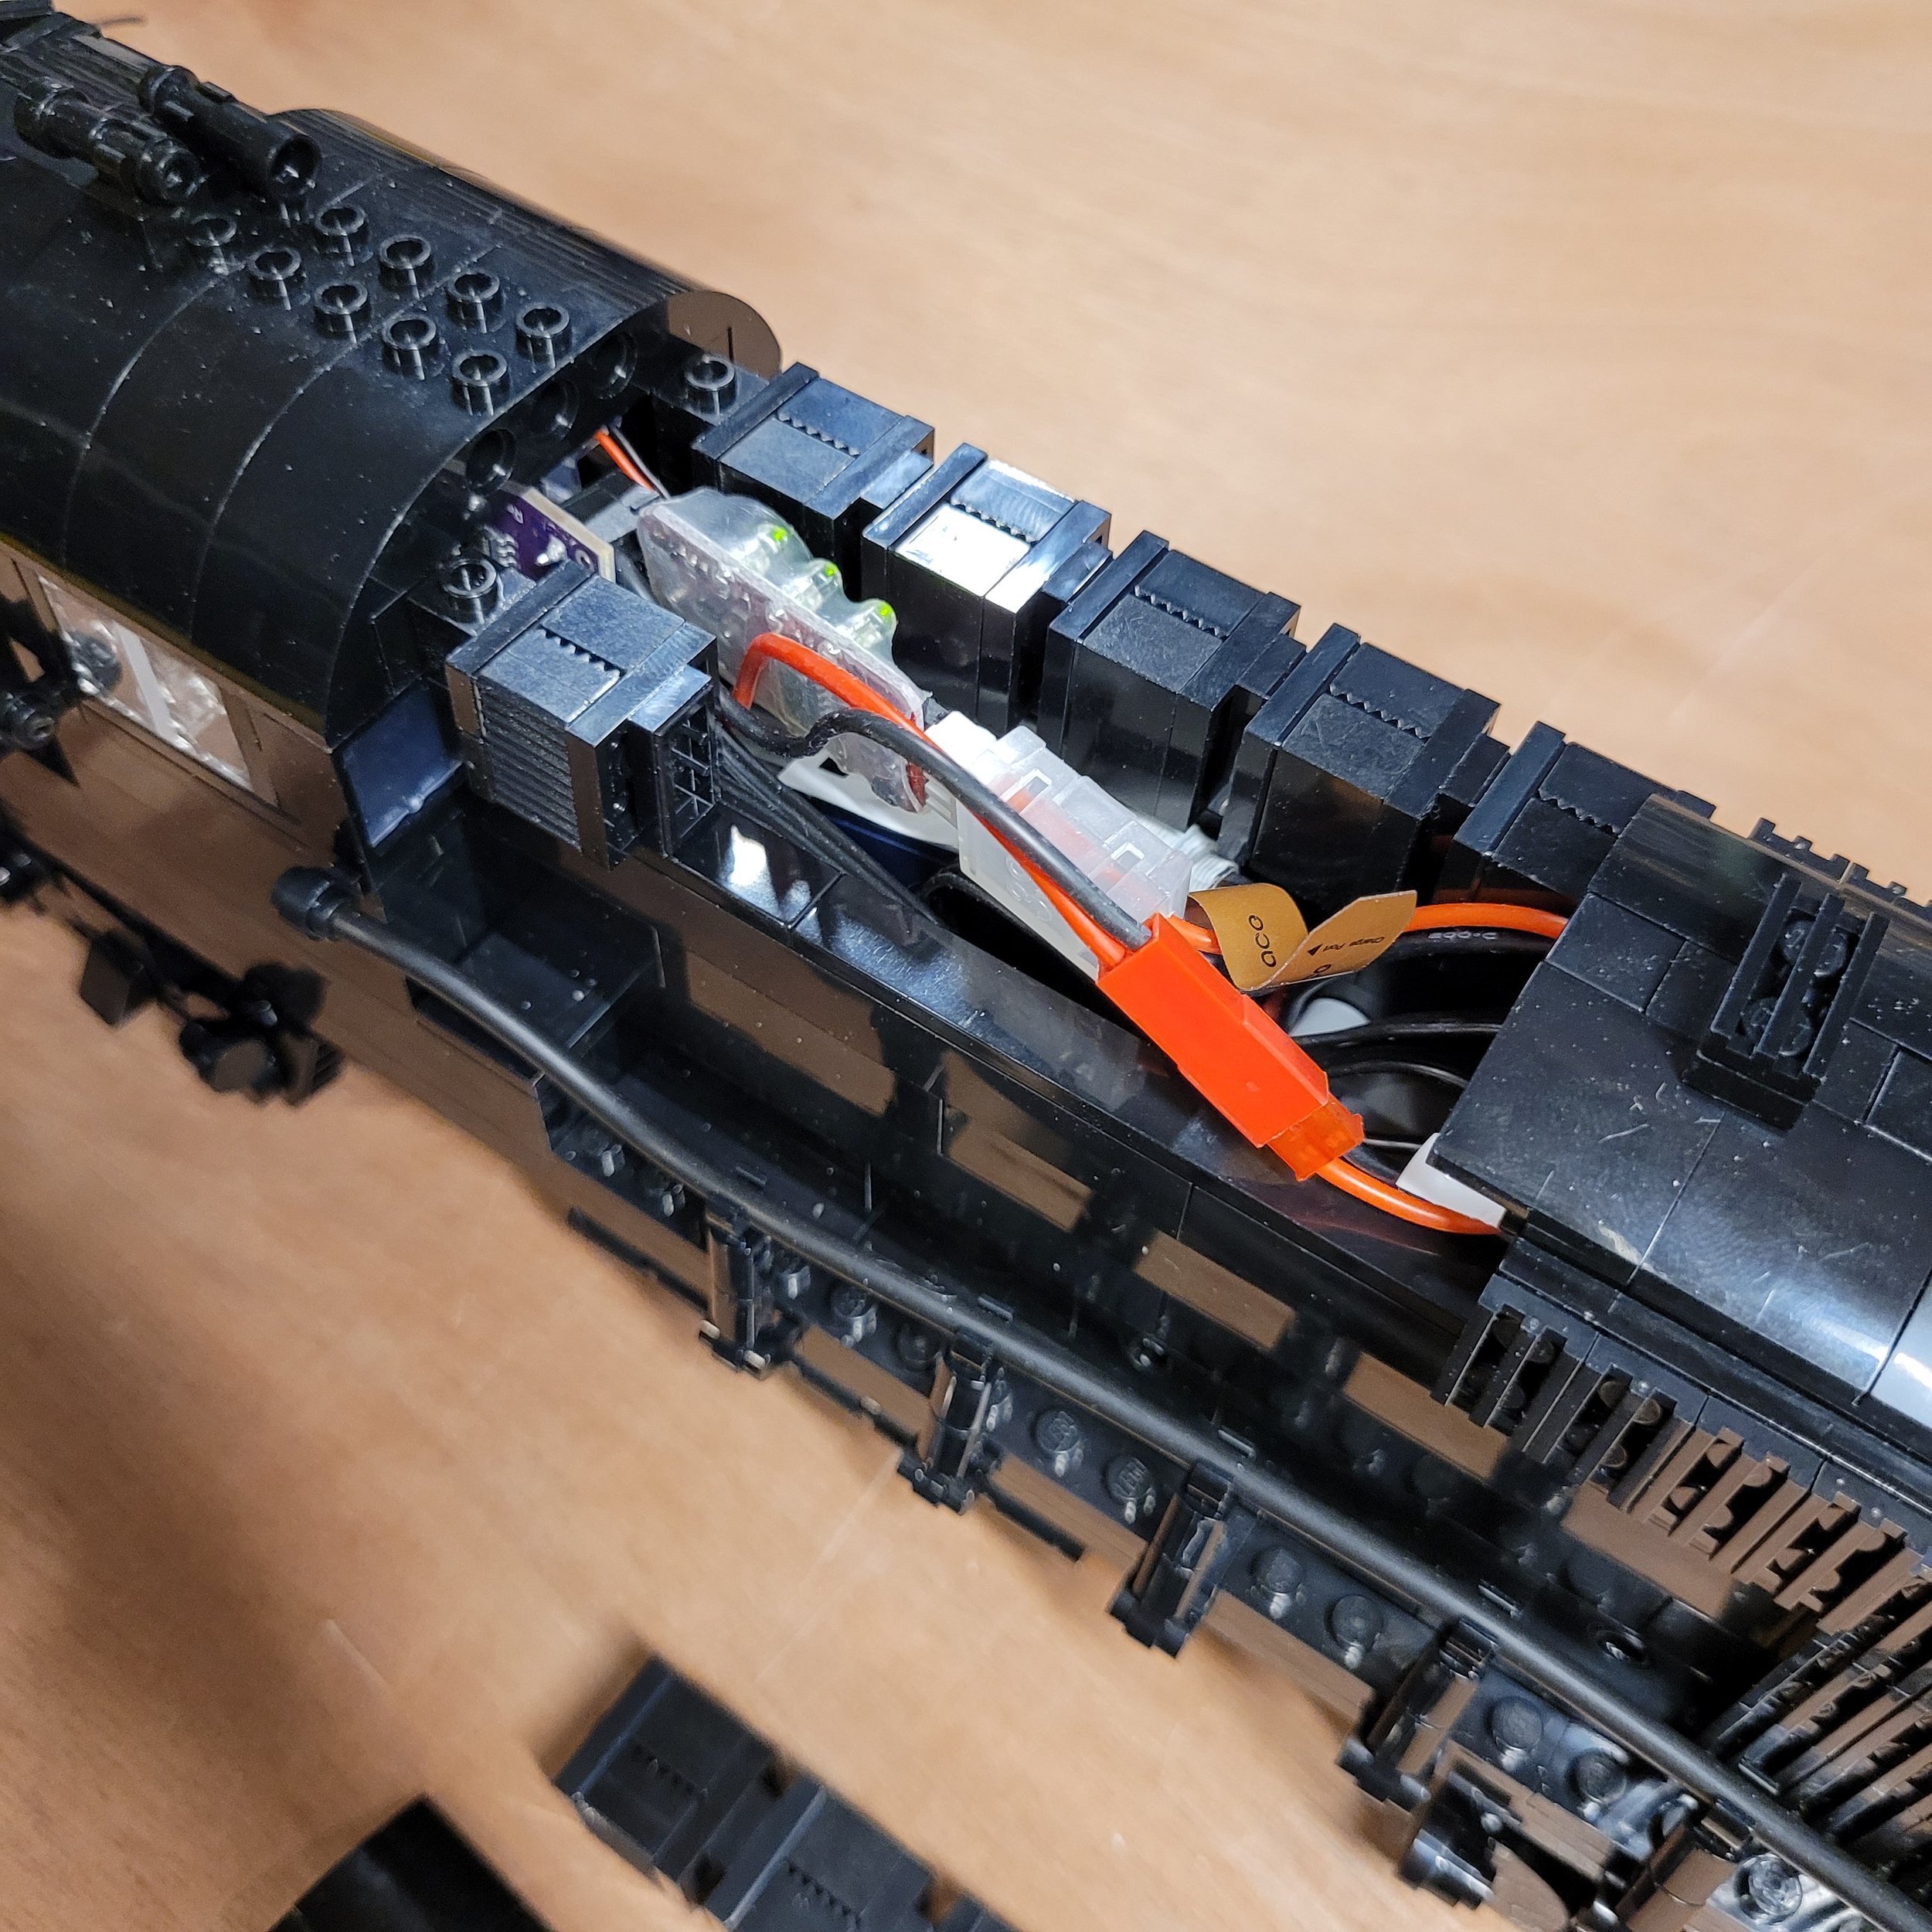
Now for the interesting part: cramming the board, plugs, and battery, all inside your LEGO® locomotive!
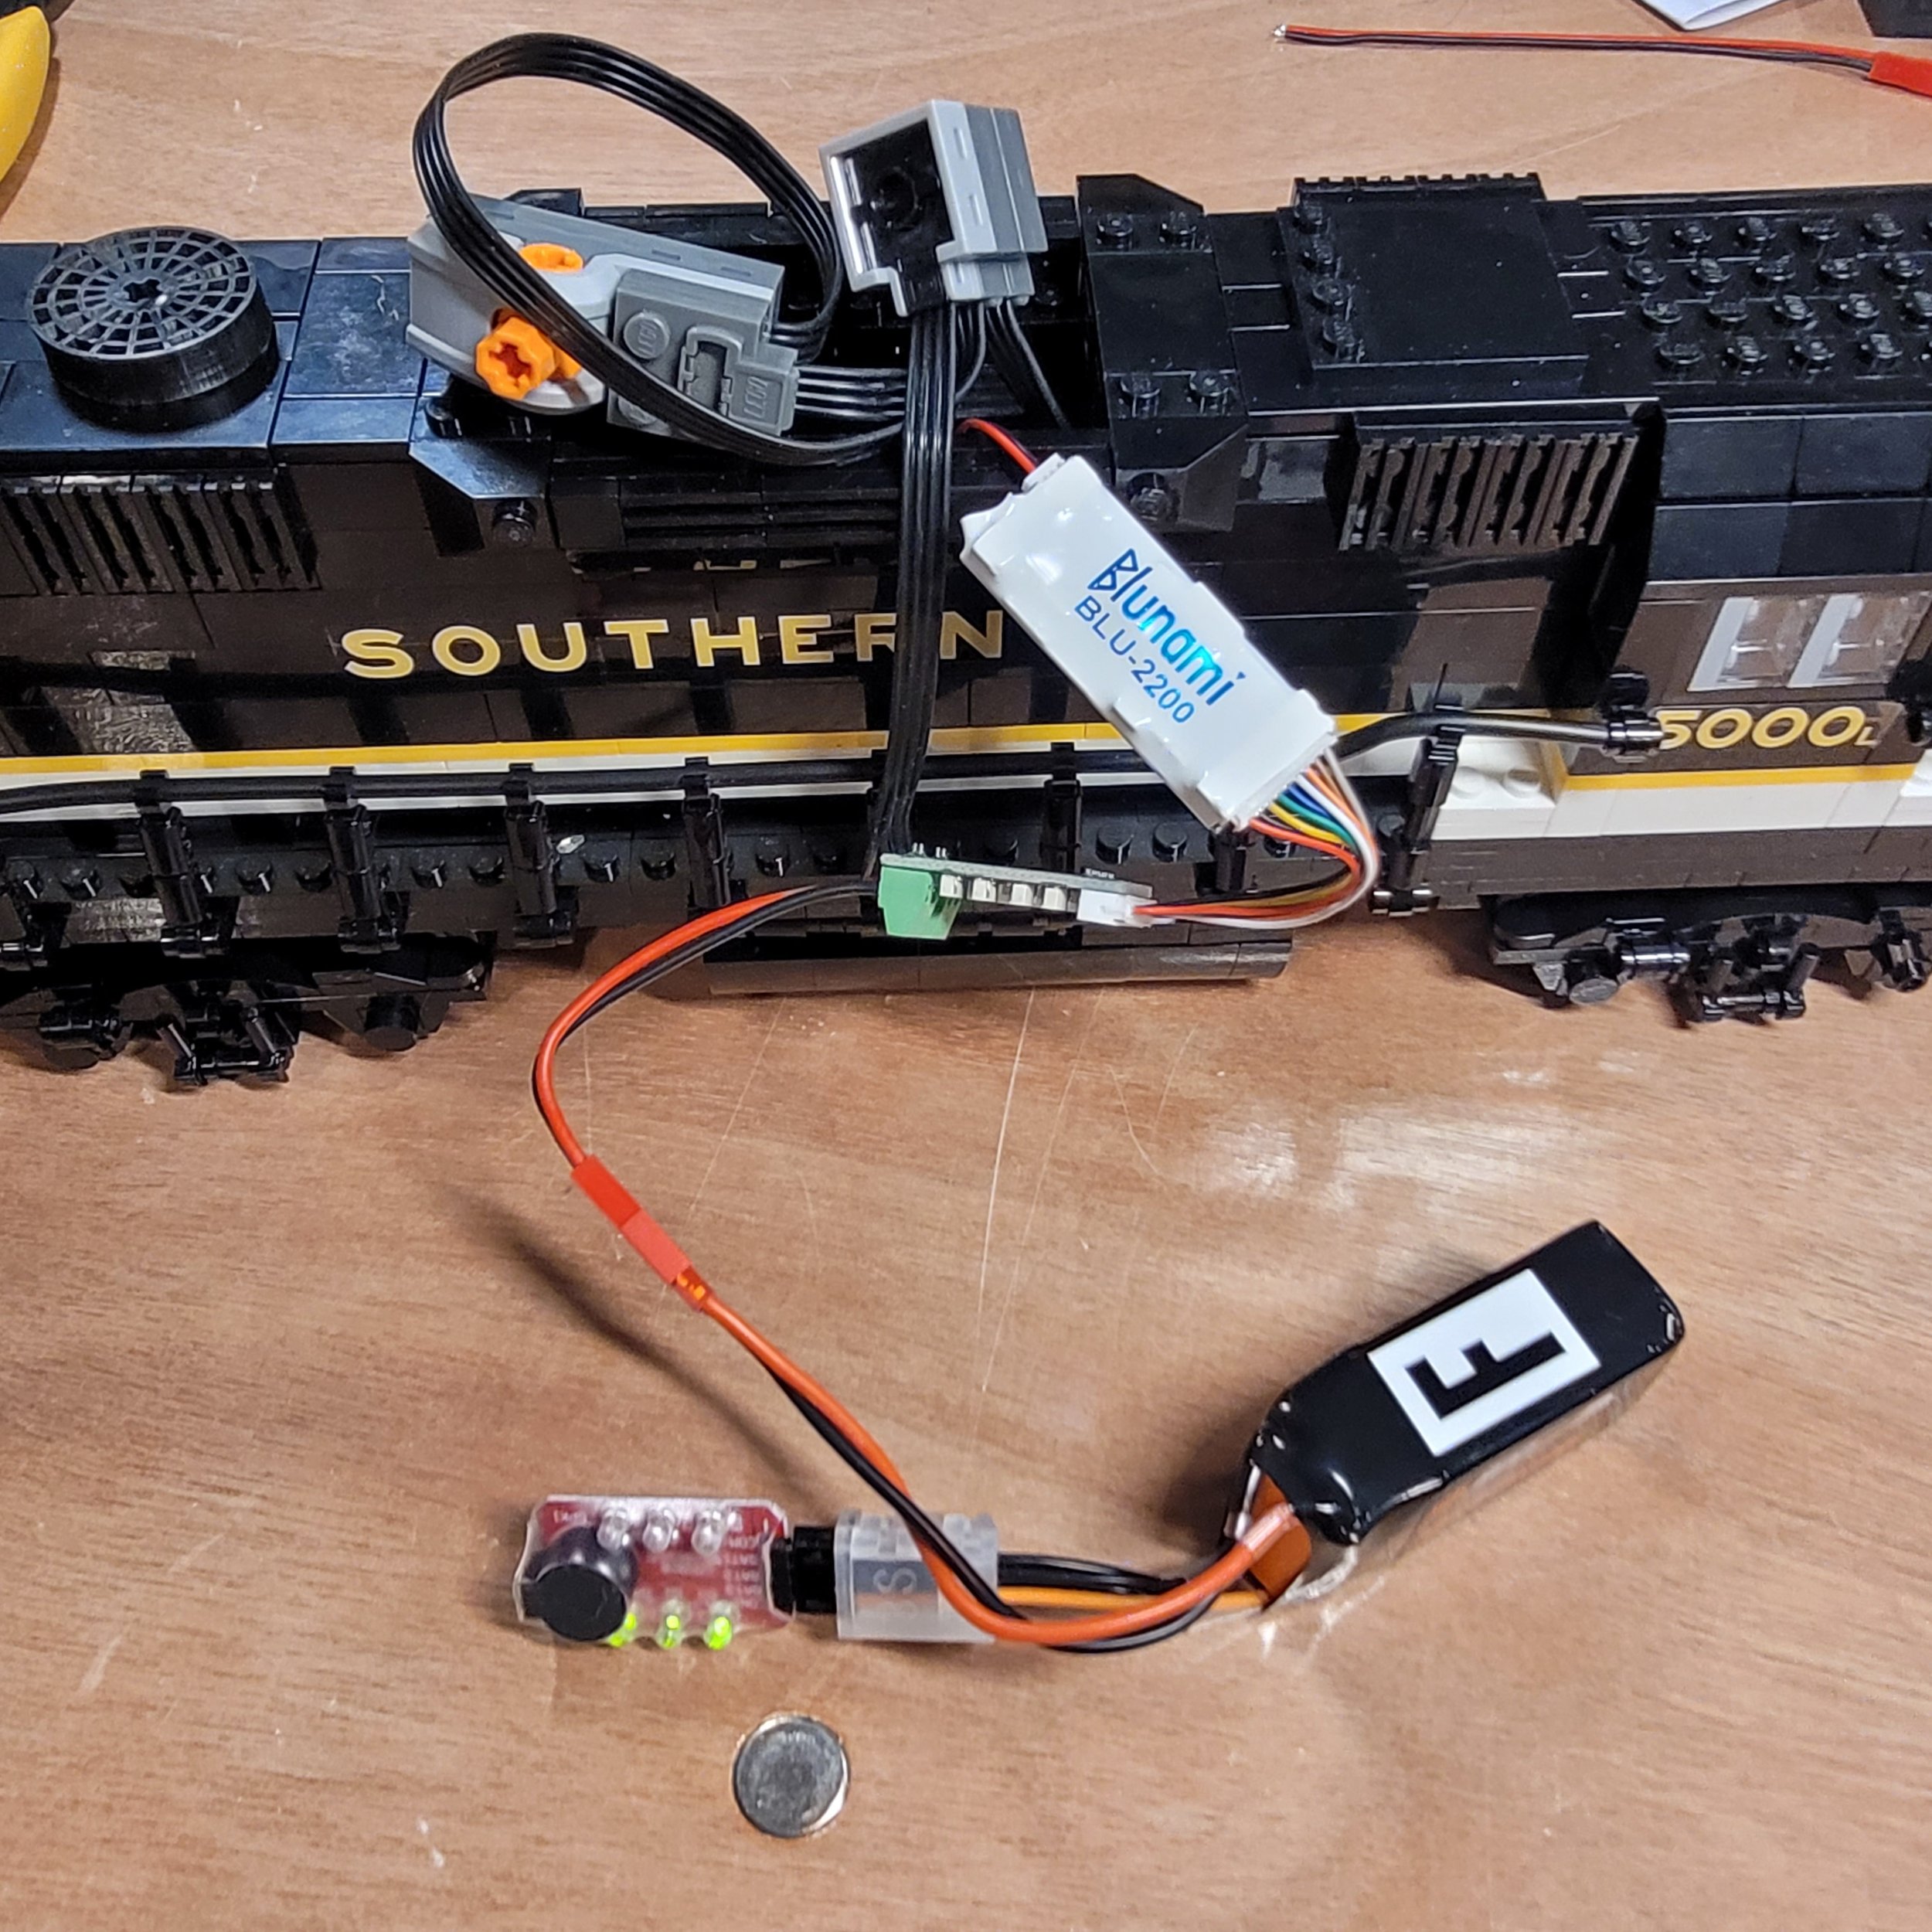
Note that I am using a Power Functions polarity switch to allow the two train motors to move in the same direction at the same time. The “F” on the battery helps me keep track of which battery is which, same as if they were numbered.
When you plug in the battery, assuming you’ve done it all correctly, you’ll hear a bell ringing for a few seconds, and then the sound of the prime mover (the fancy term for the engine of a diesel locomotive) starting up. Open up the Blunami app on your smart device, making sure that Bluetooth is enabled.
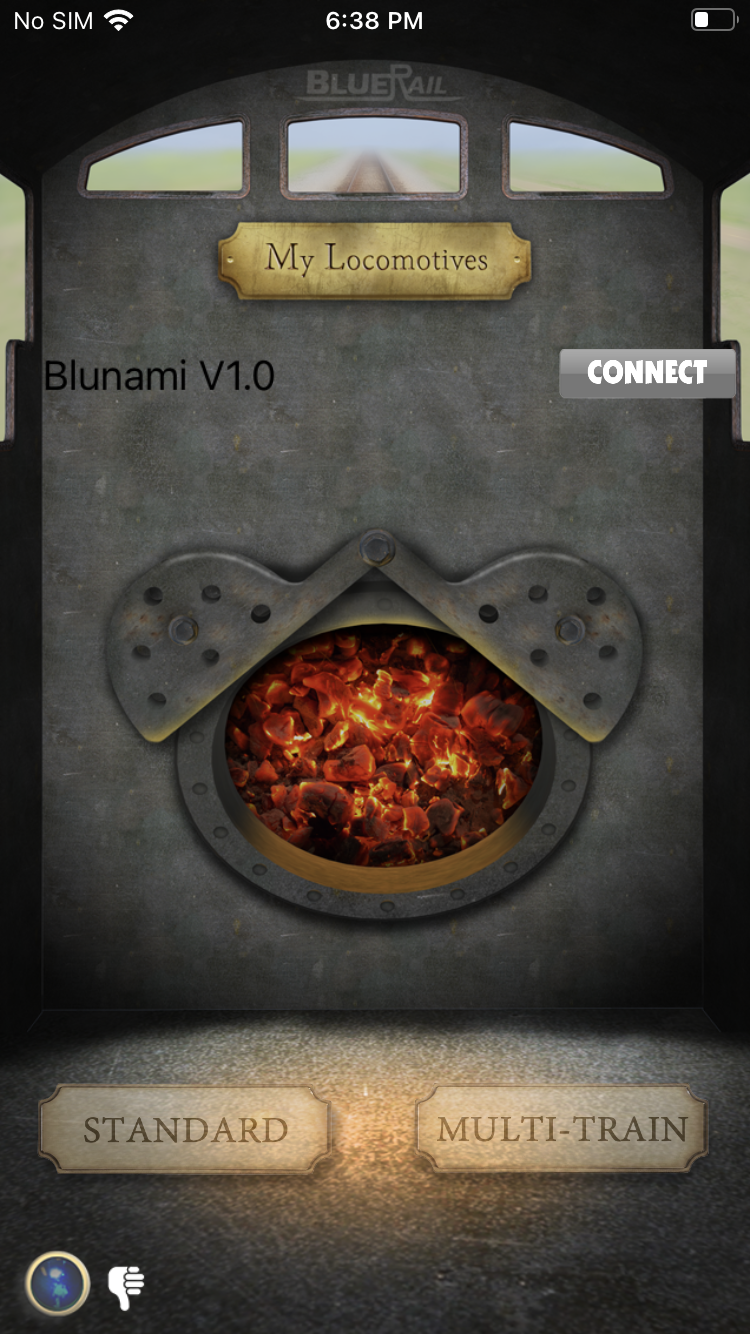
You will be greeted with this screen. Tap the “Connect” button, and once connected, tap “Standard.” The app will take a moment to gather Blunami data, and when the locomotive is fully connected to the app and ready to run, it will sound a single short blast of the horn. The green slider controls the throttle, and the red “STOP” buttons will quickly bring your train to a full stop if needed. Handy buttons are nearby for activating the bell, horn, and lights.


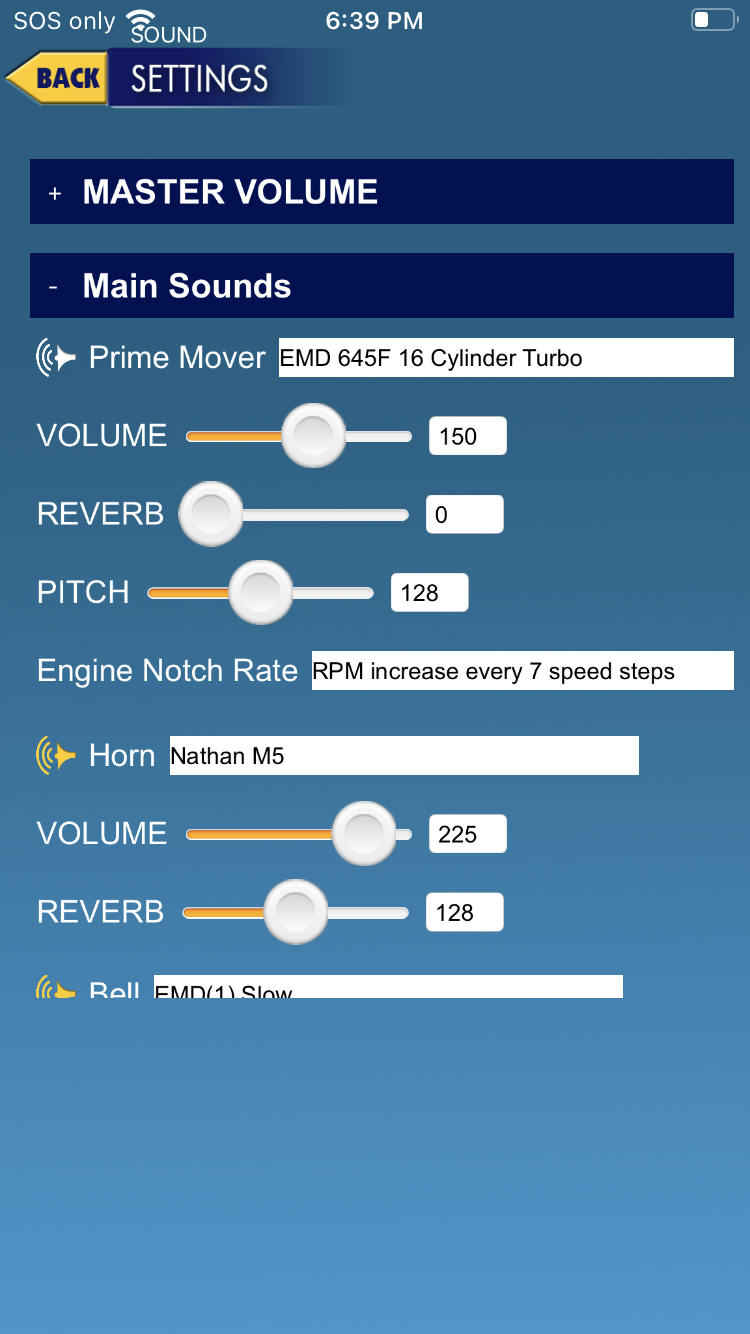
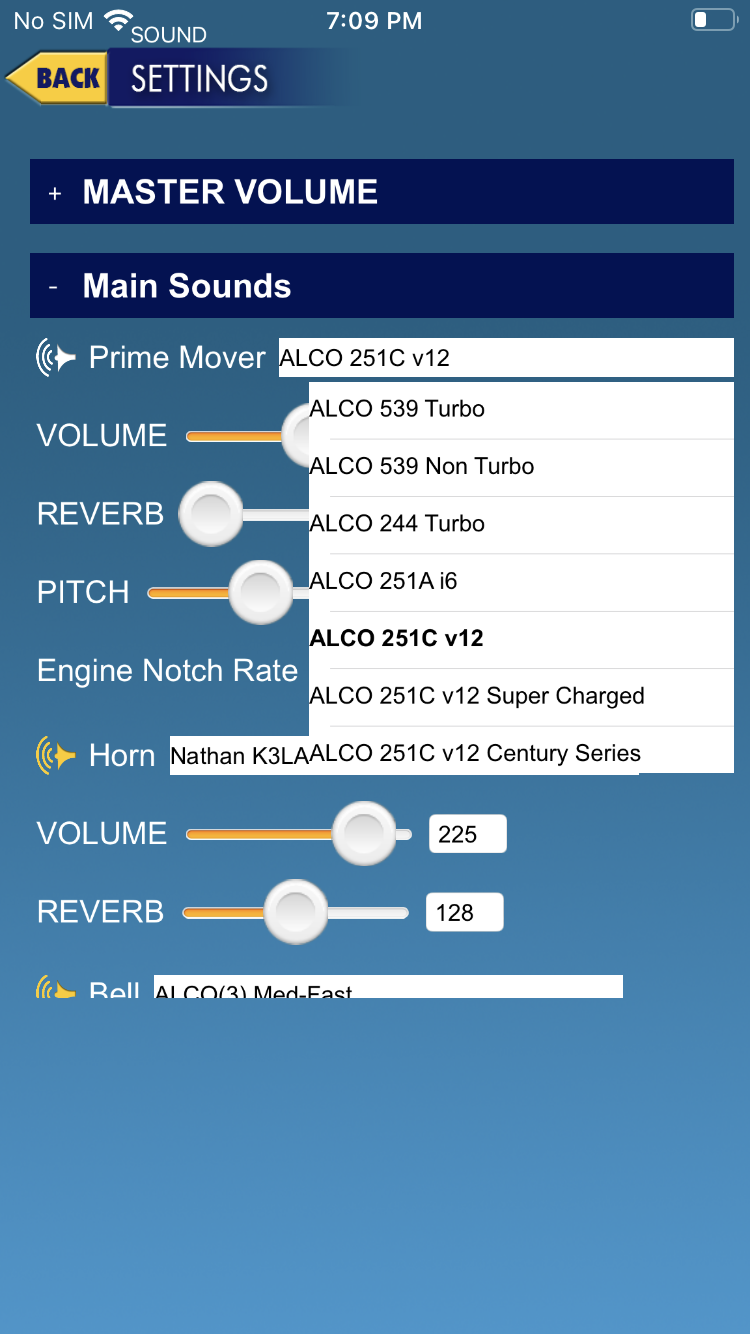
Let’s go into the settings for our board (accessed by the gear button at the bottom) and in the top text box where it reads “Blunami V1.0" we can name our locomotive accordingly. We can also change the sound settings, such as the master and individual volumes, the specific types of horns, bells and prime mover sounds being used, along with a host of other functions.

Now your Blunami-equipped LEGO® locomotive is ready to run!

Installing a 4408 Blunami Board
The process for installing the 4408 board is largely the same as above, except you don’t need to cut away plastic, or install a separate adapter board. All the screw terminals on the 4408 board are ready to go!
As described above, screw your Motor control wires into the terminals for M+ and M- and your Power leads into LR (black) and RR (red). There is no plug for the speaker wire, instead cut off the speaker plug (or use an extension wire with bare ends) strip the coating off the last half-centimeter-ish of each speaker wire, and screw the red side into S+ and the black into the S- terminal. Make sure you run your speaker wire through the locomotive first, which may make screwing in the wire ends a bit of a challenge, but it will be perhaps less of a challenge than trying to stuff the speaker through the locomotive after connecting the wires!


Now, fetch your battery and plug it into the battery lead, then see about cramming all this stuff inside your locomotive. Because the interior of my RS-11 is a bit cramped, I had to rebuild it a bit to make sure I could fit everything inside.
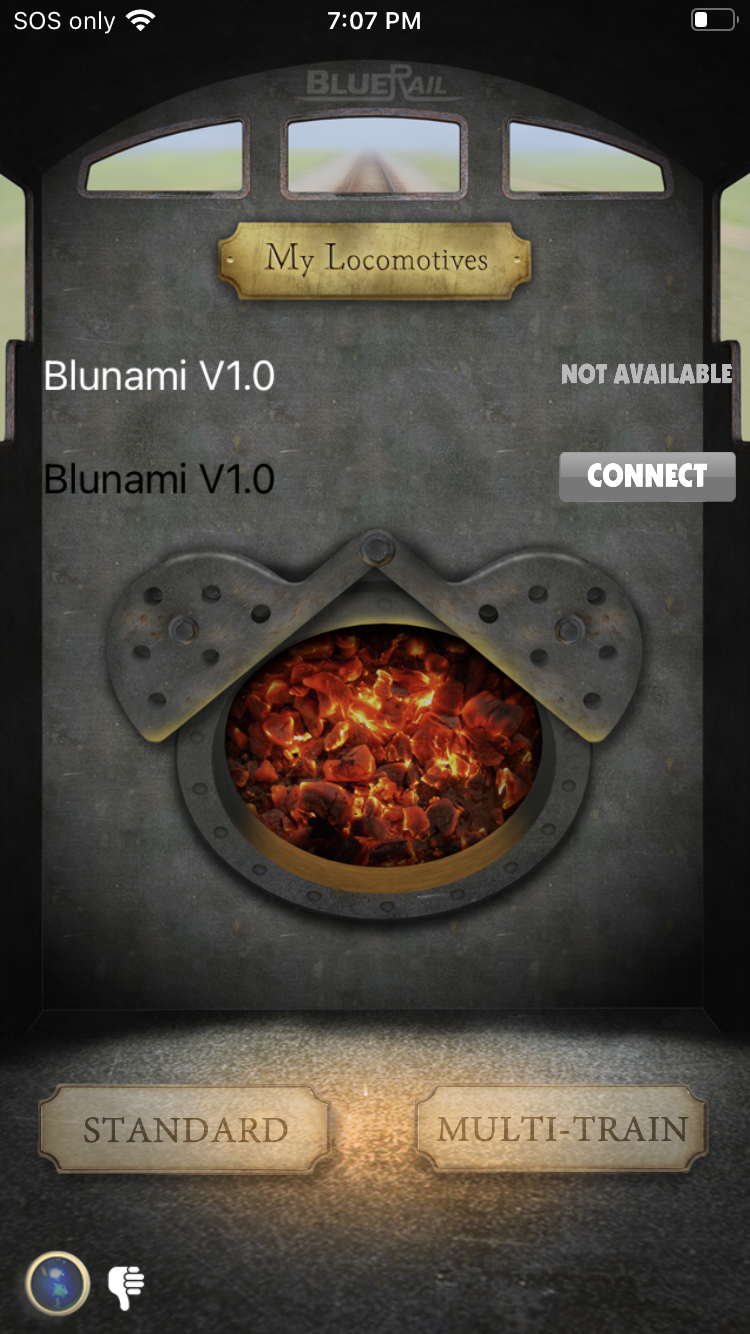
Once again, when plugging in your battery lead, you will hear a bell sound for a few seconds, and then the prime mover will crank into life. Let’s open up our Blunami app and select our 4408 board. Notice that now we have multiple locomotives in the list that greets us when open the app. If a locomotive is On (battery plugged in) and ready to connect, it will show the “connect” button next to its name. If a locomotive is Off, it will still show in the list as “not connected.” We’ll tap the “Connect” button next to the board we’ve just installed, which is the only one currently On and ready to connect. Remember to rename your locomotives/decoders as one of the first things you do when setting them up, otherwise you’ll just have a list of nothing but “Blunami V1.0” over and over again, and it’ll be hard to tell which locomotive is which!

Once again, we tap “Connect,” then “Standard” and when the locomotive is fully connected to the app, the horn will sound a single short blast. Again, we can go into the settings by tapping the gear button and rename our locomotive, change the sound and light settings, and much more.
If you wish to run multiple locomotives at once, you can tap “Connect” on each locomotive you wish to use, and then select “Multi-Train.” In the Multi-Train setting, you can build up to four consists (A, B, C, and D) and select a locomotive to “lead” each consist. The “lead” locomotive is the only one that will respond to sound and light commands, but all the locomotives in the consist will respond to start/speed/stop commands. There are also buttons for “Forwards” and “Backwards” to tell the app which way a locomotive is facing, so you can run them all moving in the same direction without having to physically turn the locomotive itself.
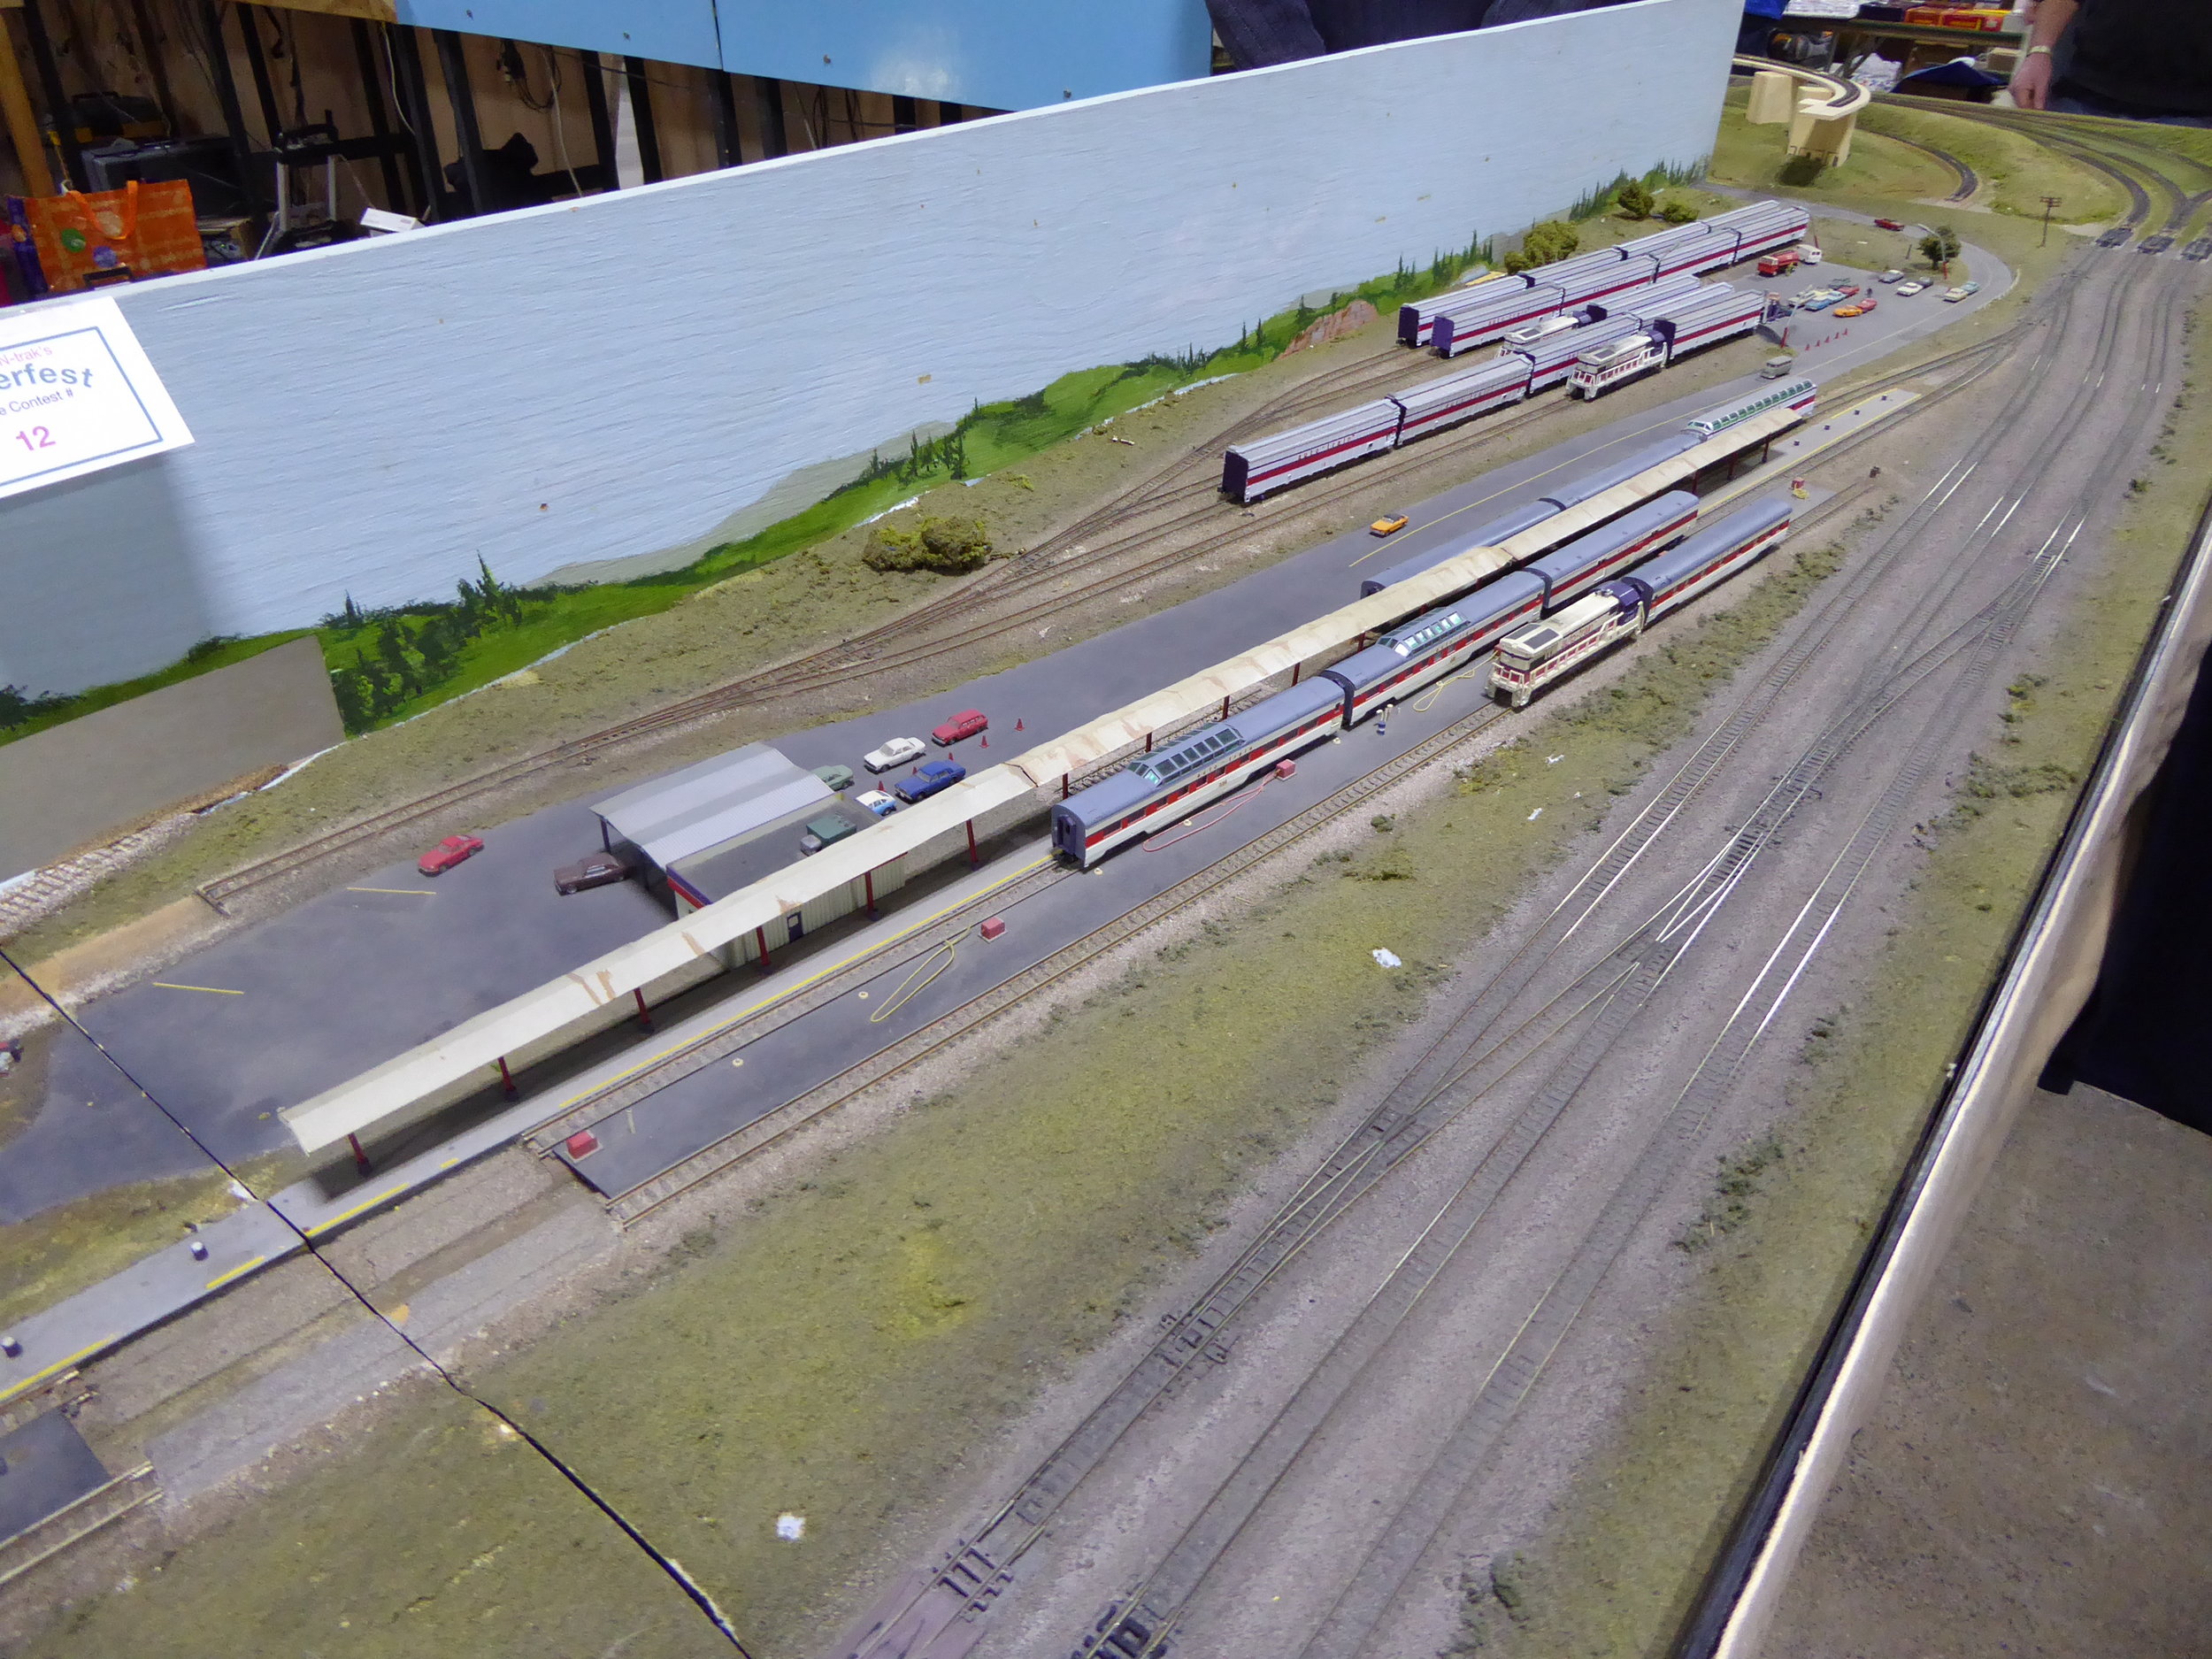
Why I love Blunami: this is a 50 car train with 3 engines up front and 2 in the middle.
And that’s it! Now you’re ready to run your Lego trains with extended control range, sound, lights, and easy multiple-unit consists! I hope that this tutorial worked well for you. Personally, I don’t consider myself to be very gifted when it comes to tools, electronics, and the tinkering with either of them, and yet I find that doing this kind of install is somewhat easy. If I can do it, YOU can do it!
For further information, including how-to videos on installation and operation, I highly recommend checking out the Soundtraxx YouTube page.
Thanks for reading, and happy model railroading!